DIY WiFi Pineapple
Introduction
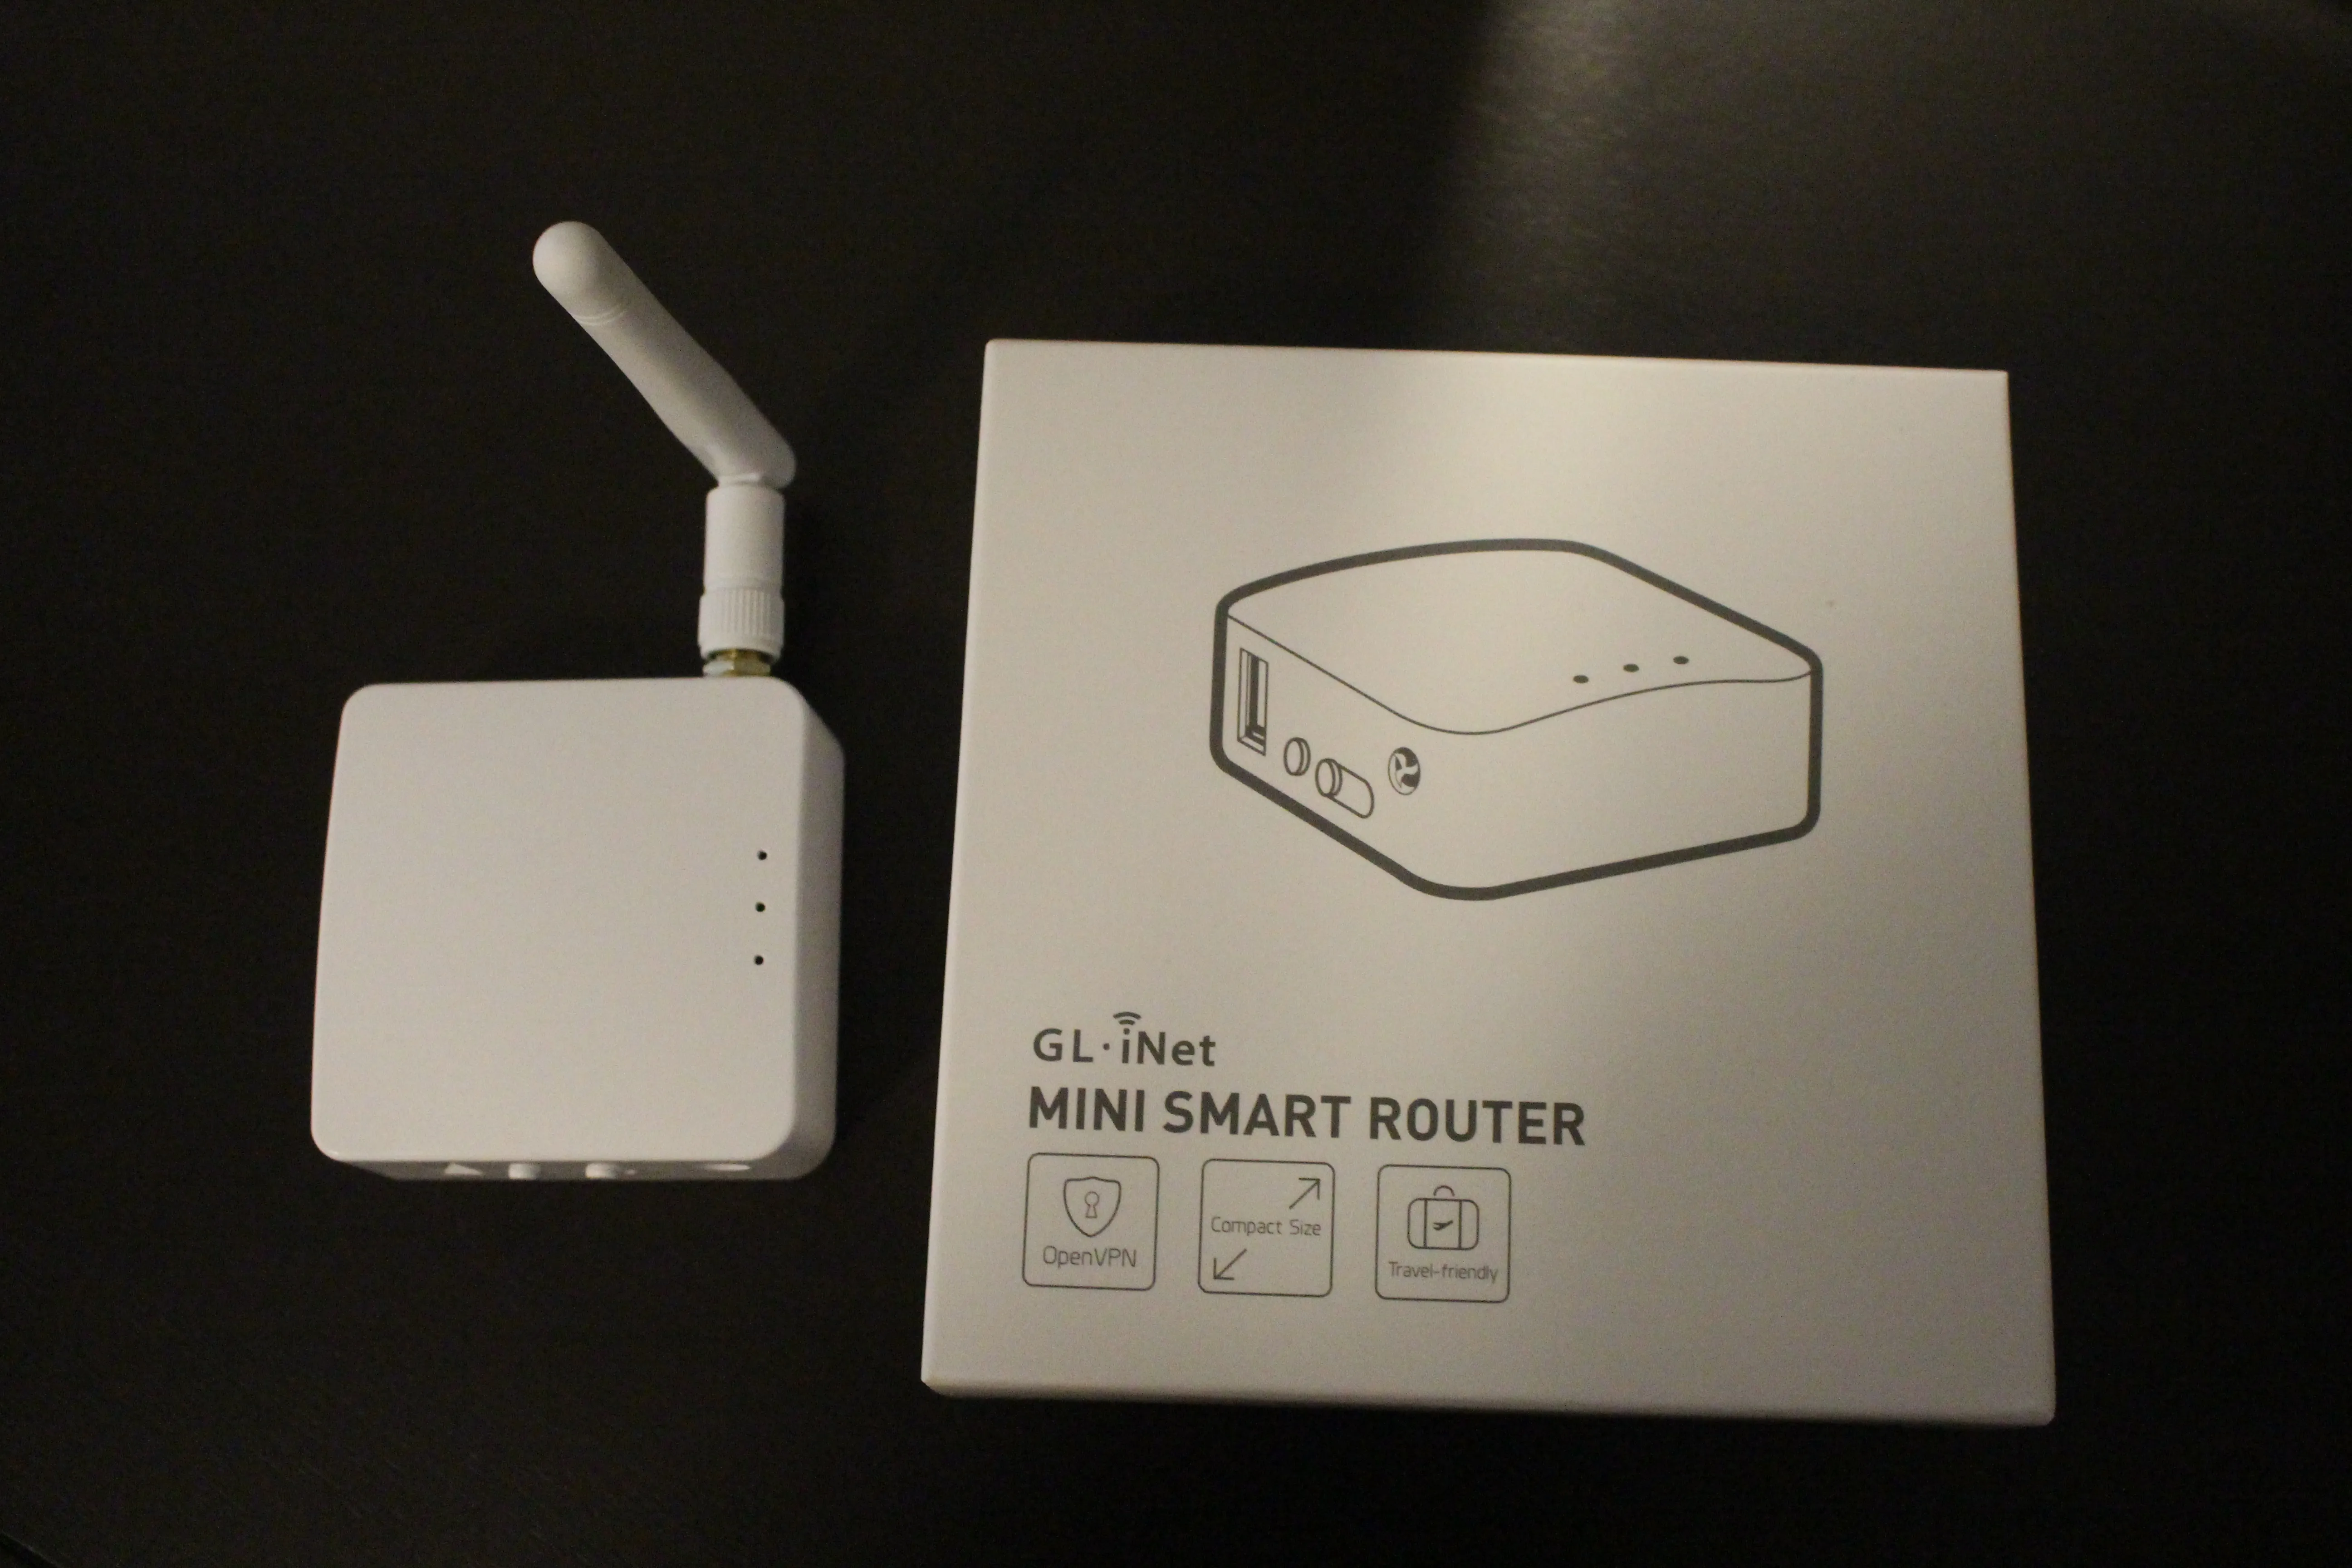
This guide will give you everything you need to build your own customizable wifi pineapple on a budget using the GL.iNet GL-AR150. The guide includes step by step pictures, alternative analysis, power metrics, and more!
What is WiFi Pineapple?
This guide contains the following sections:
- Comparing Pineapples - Shows hardware differences of both products
- Materials Needed - List of materials you need to build an AR150 WiFi Pineapple
- Flashing Pineapple Firmware - Step by step guide to install the Pineapple firmware
- Hardware Modifications - A guide to integrate the USB hub into the case of the AR150
For additional resources on my website click the links below:
Comparing Pineapples
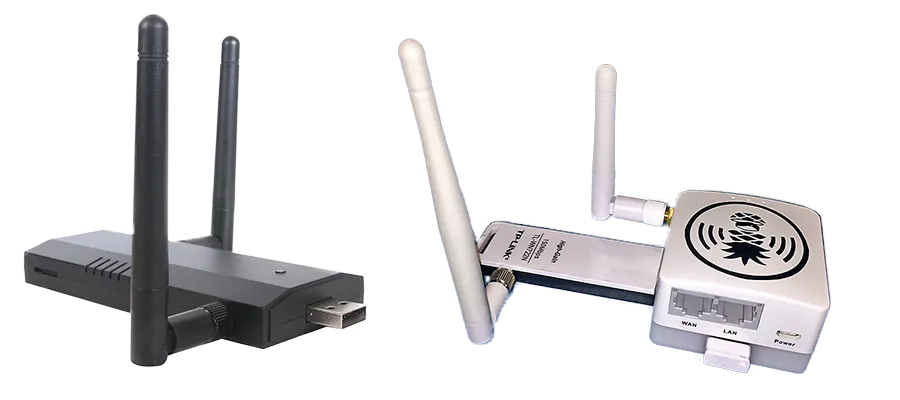
Hardware Differences: None
| Nano | AR150 | |
|---|---|---|
| CPU | Atheros9331, 400MHz SoC | Atheros9331, 400MHz SoC |
| Memory | DDR2 64MB | DDR2 64MB |
| Storage | Flash 16MB | Flash 16MB |
| Wireless 1 | Atheros AR9331 (IEEE 802.11 b/g/n) | Atheros AR9331 (IEEE 802.11 b/g/n) |
| Wireless 2 | Atheros AR9271 (IEEE 802.11 b/g/n) | RT5370 USB WiFi Adapter (IEEE 802.11 b/g/n) |
| Price | $100 | $35 |
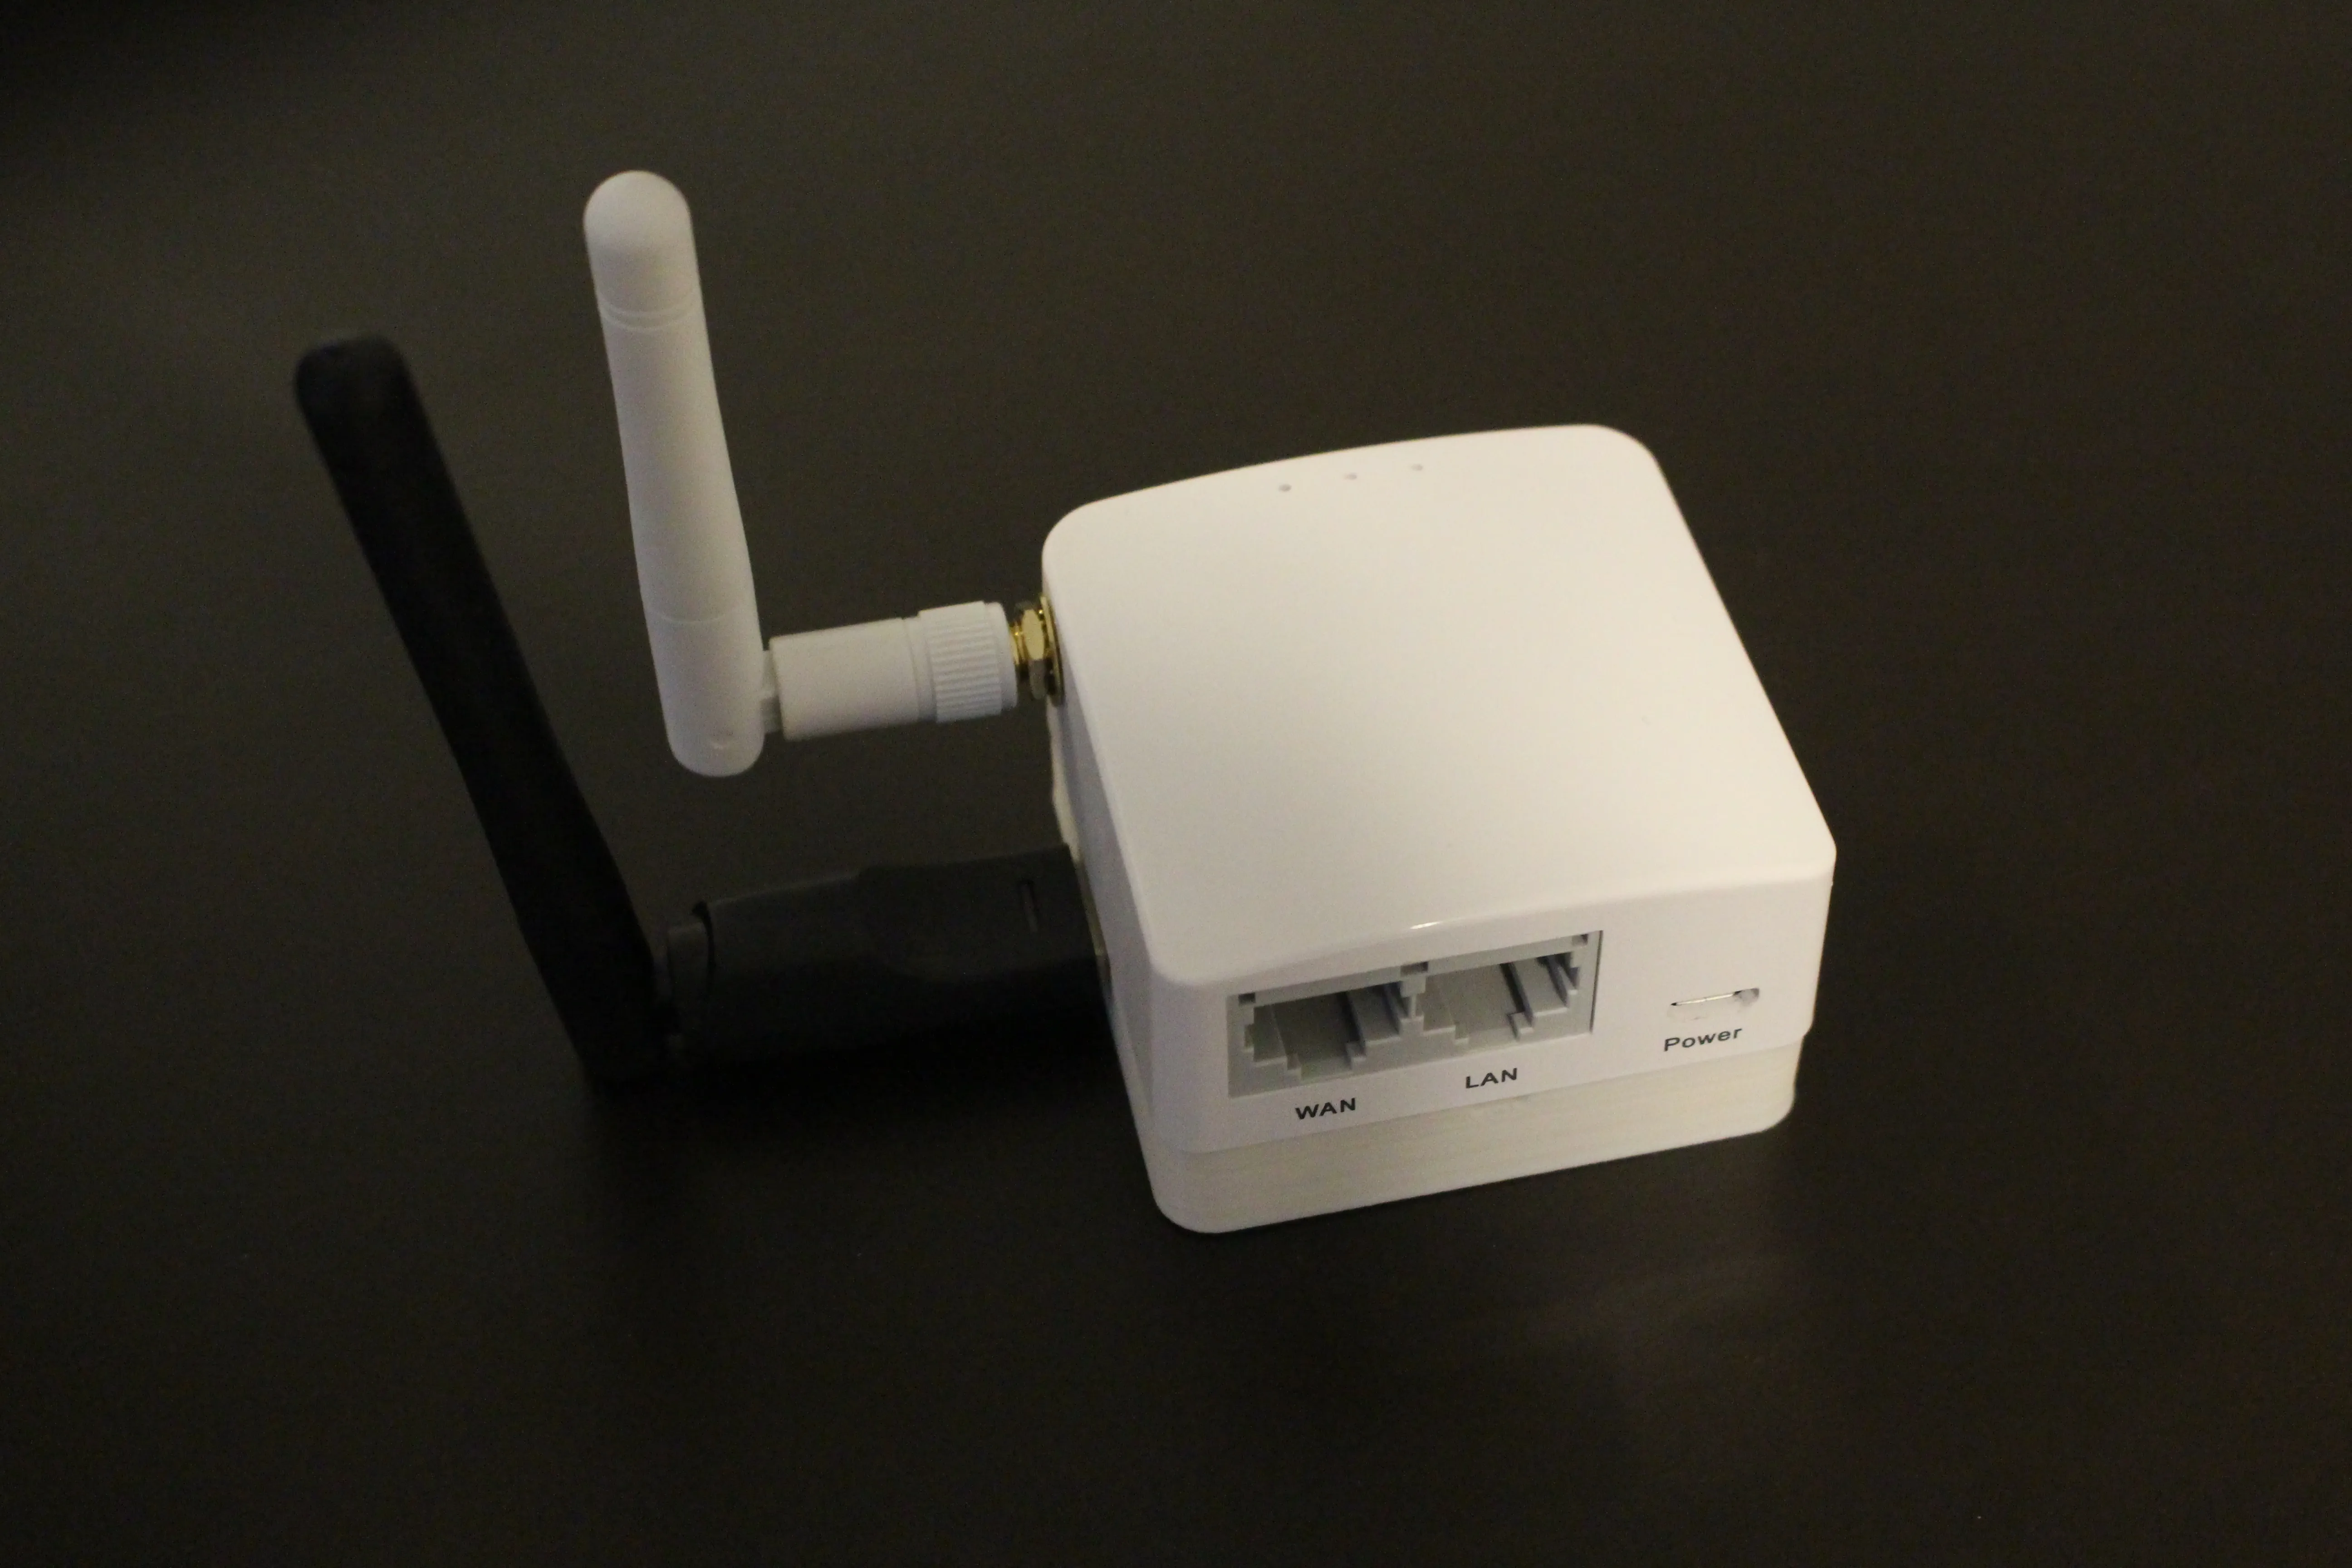
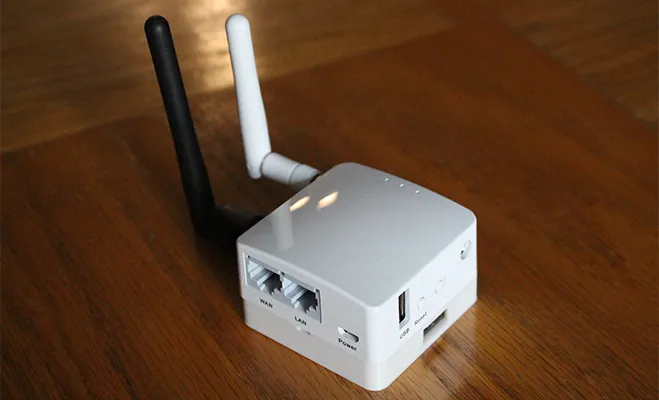
Materials Needed
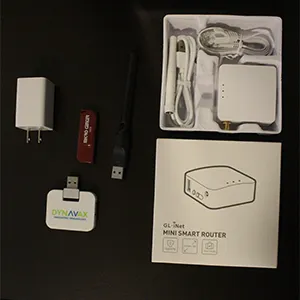
Basic (Total $35):
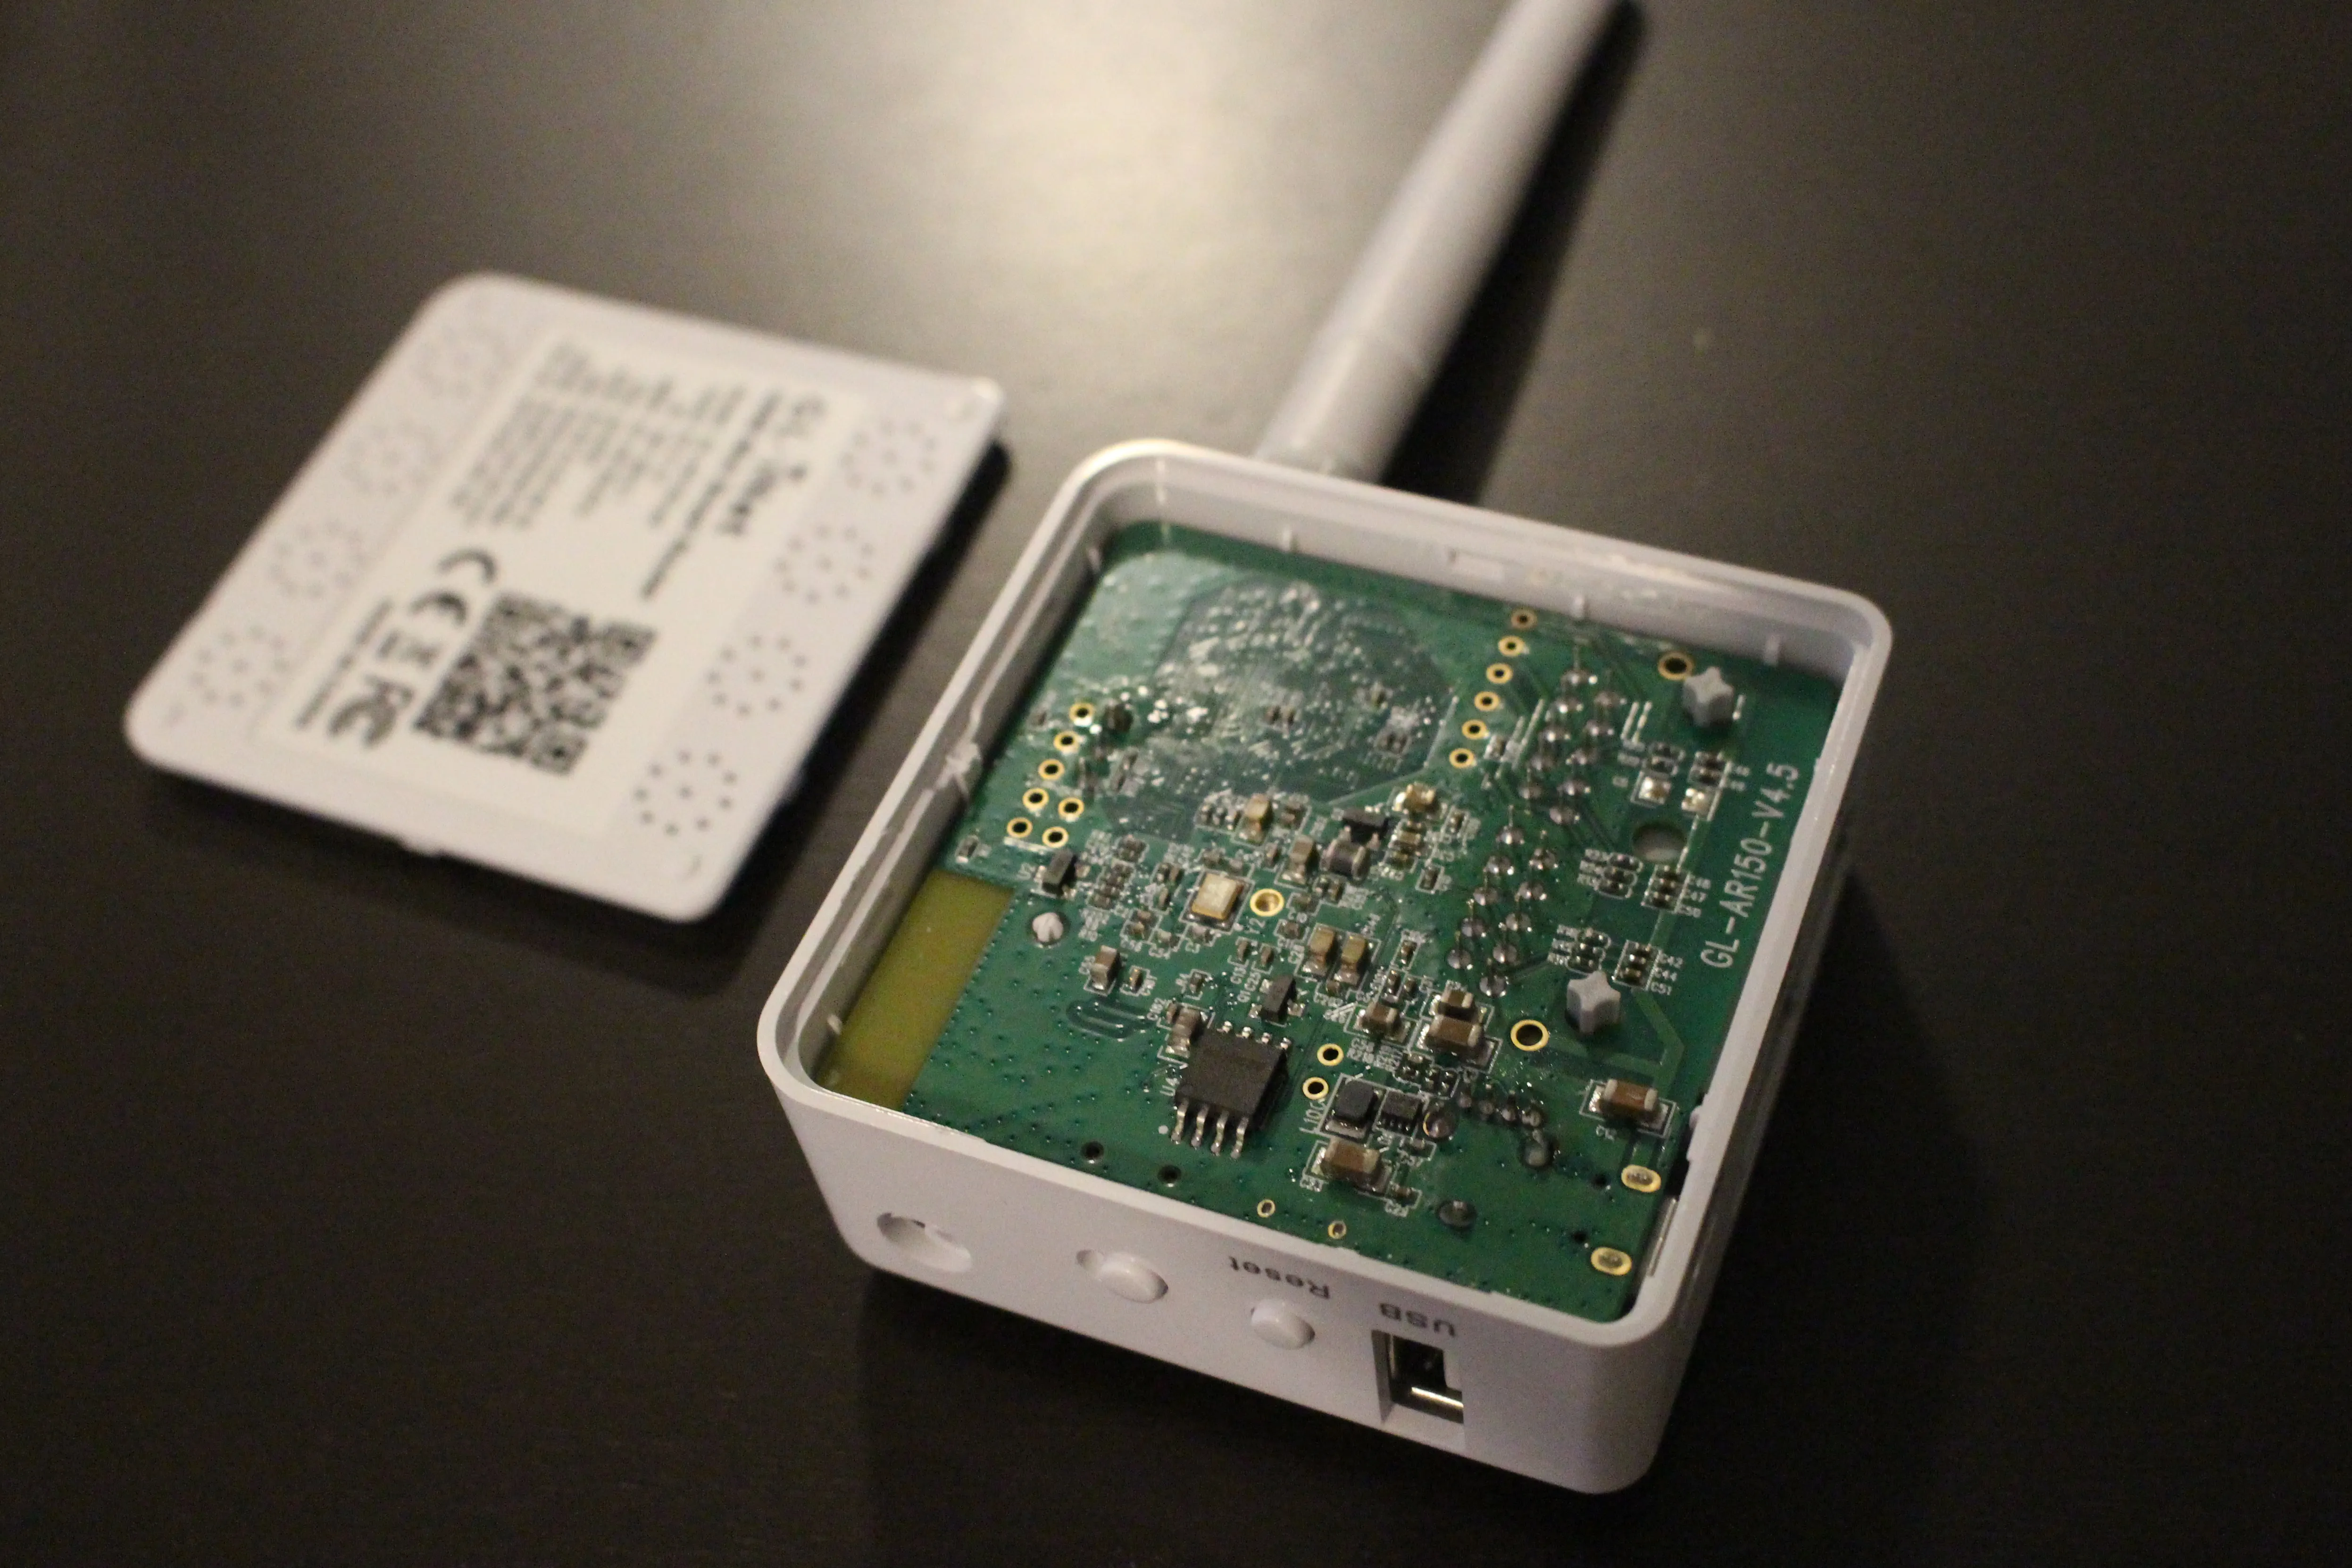
- AR150 - $26 (https://www.amazon.com/dp/B01FJ4S9JK)
- RT5370 Wifi adapter - $6 (https://www.ebay.com/itm/282647848601)
- Flash Drive (1gb and up)
- USB 2.0 Hub (NOT 3.0)
- Power adapter or external battery (CURRENT)
Advanced Materials:
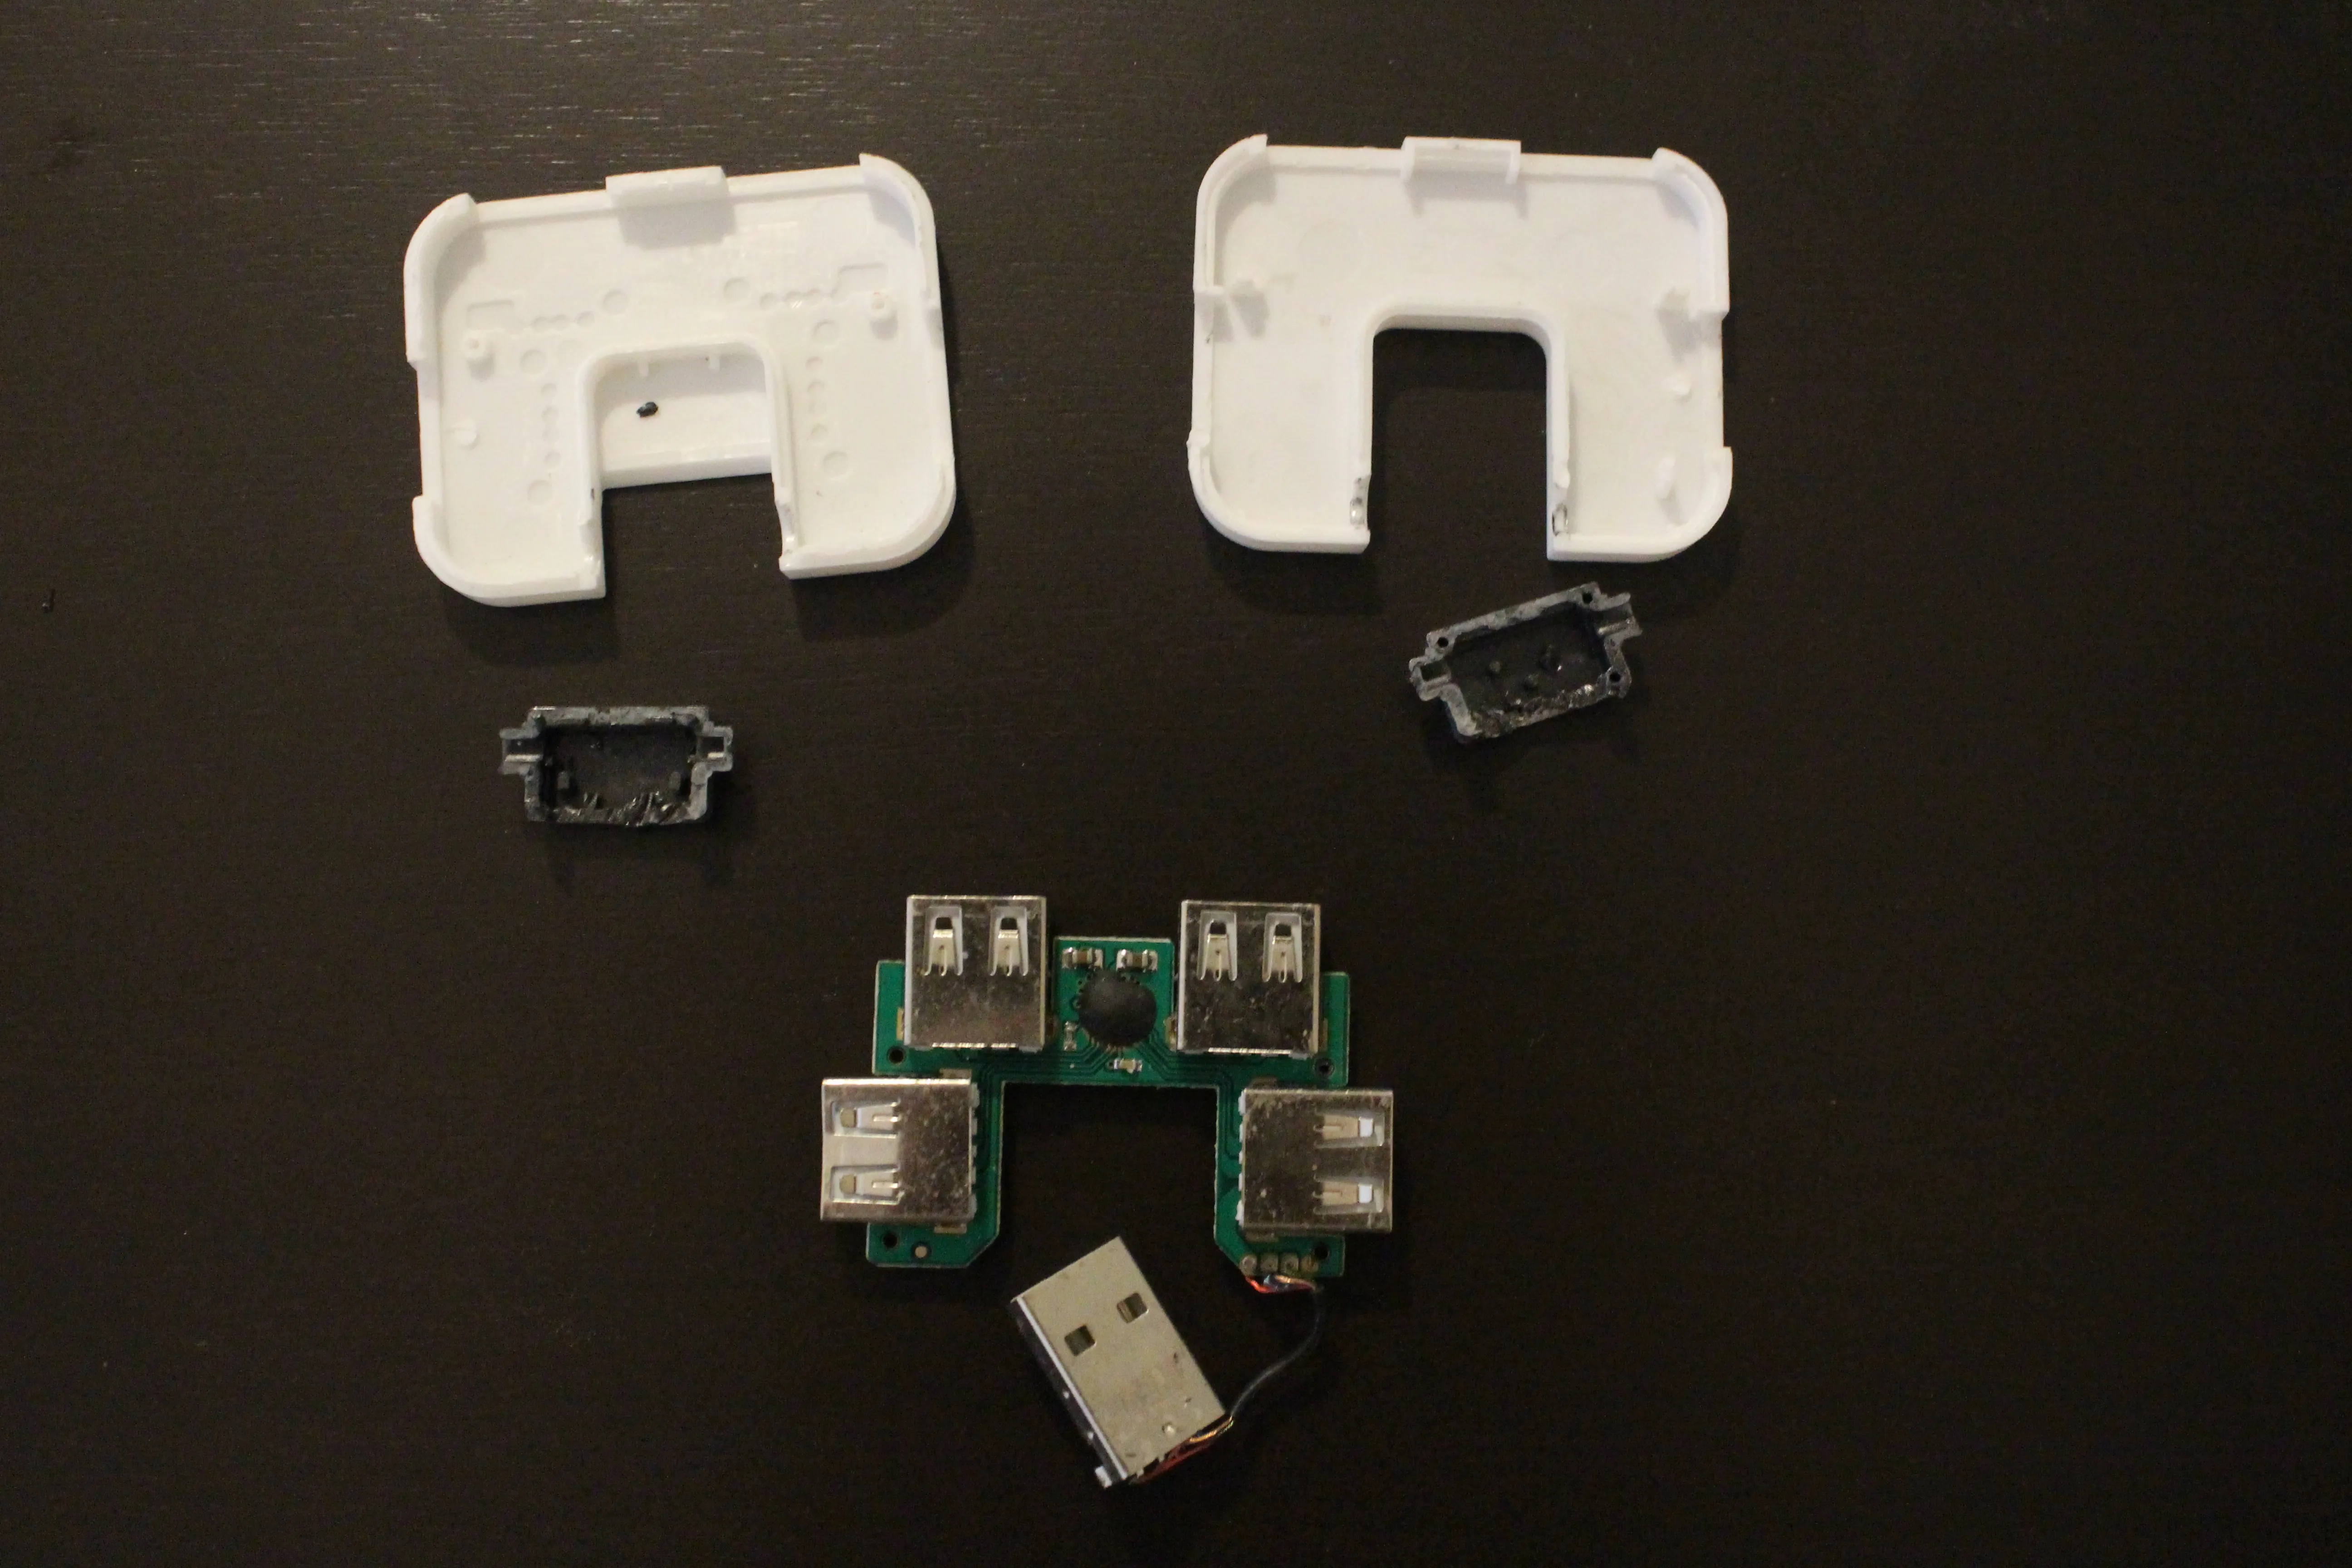
- USB Hub - $4 (https://www.ebay.com/itm/173995917456)
- Soldering Iron with fine "I" tip (https://www.amazon.com/dp/B07GTGGLXN)
- Helping Hand (https://www.amazon.com/dp/B000P42O3C)
- 3D Printed Case Extension
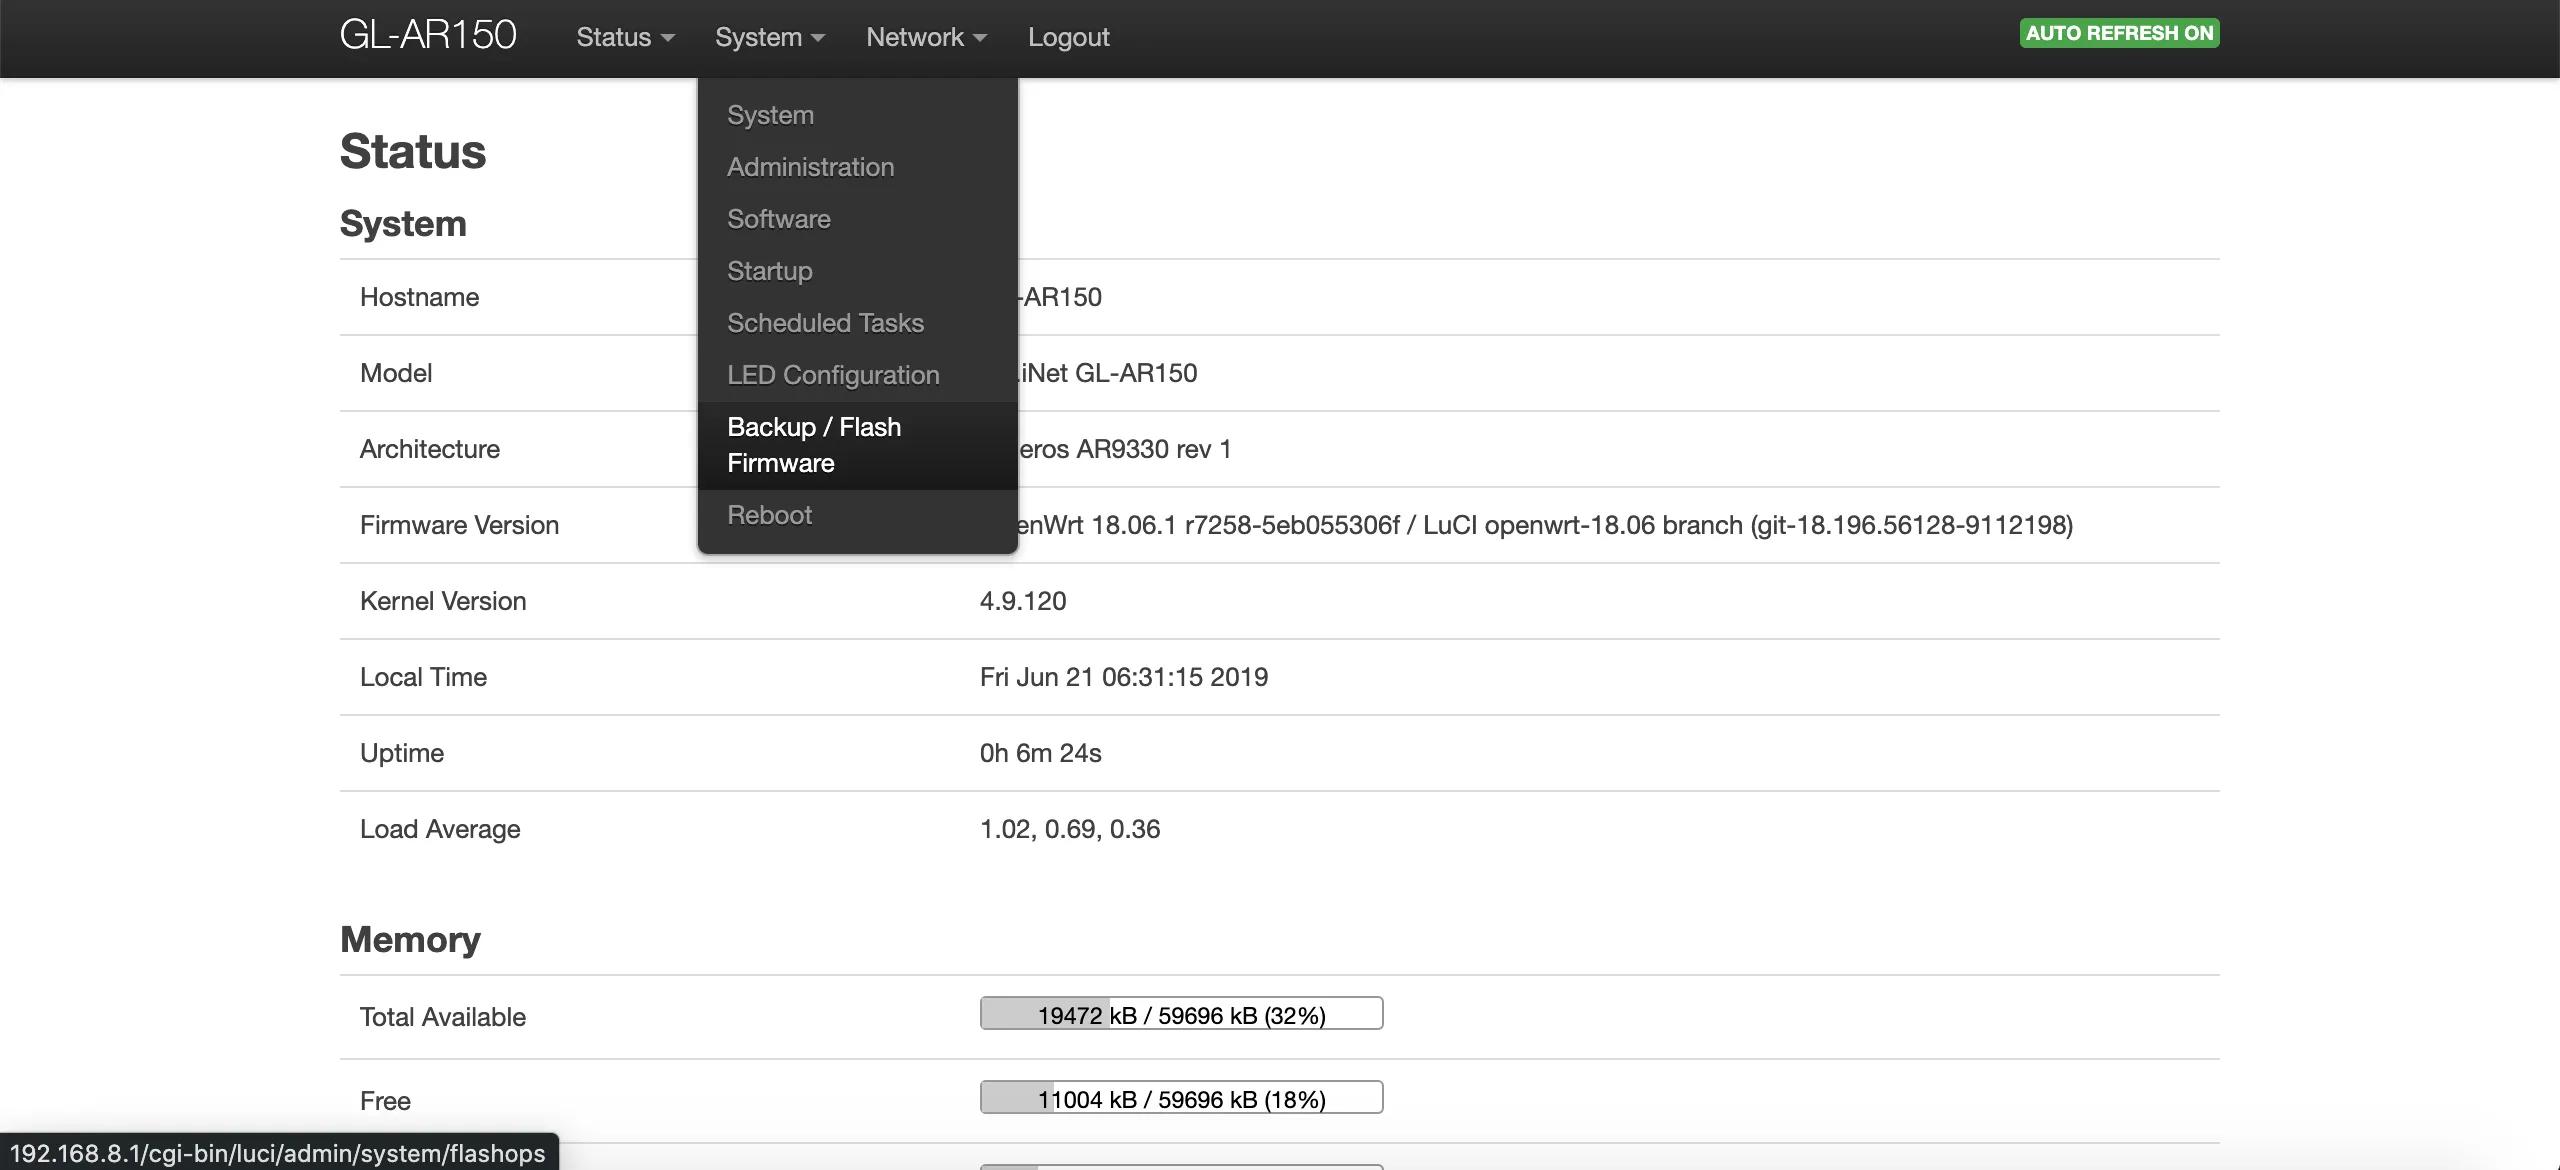
Flash Pineapple Firmware
Step 1:
Download the WiFi Pineapple firmware that was modified for the AR150: gl-ar150-nano-<version>-optimized.binDownload on GitHub
Step 2:
Power on AR150 and connect a computer to the device's LAN by one of the following:- Connect an Ethernet cable to your computer from the "LAN" port
- Connect to its WiFi network "GL-AR150-xxx" using the password "goodlife"
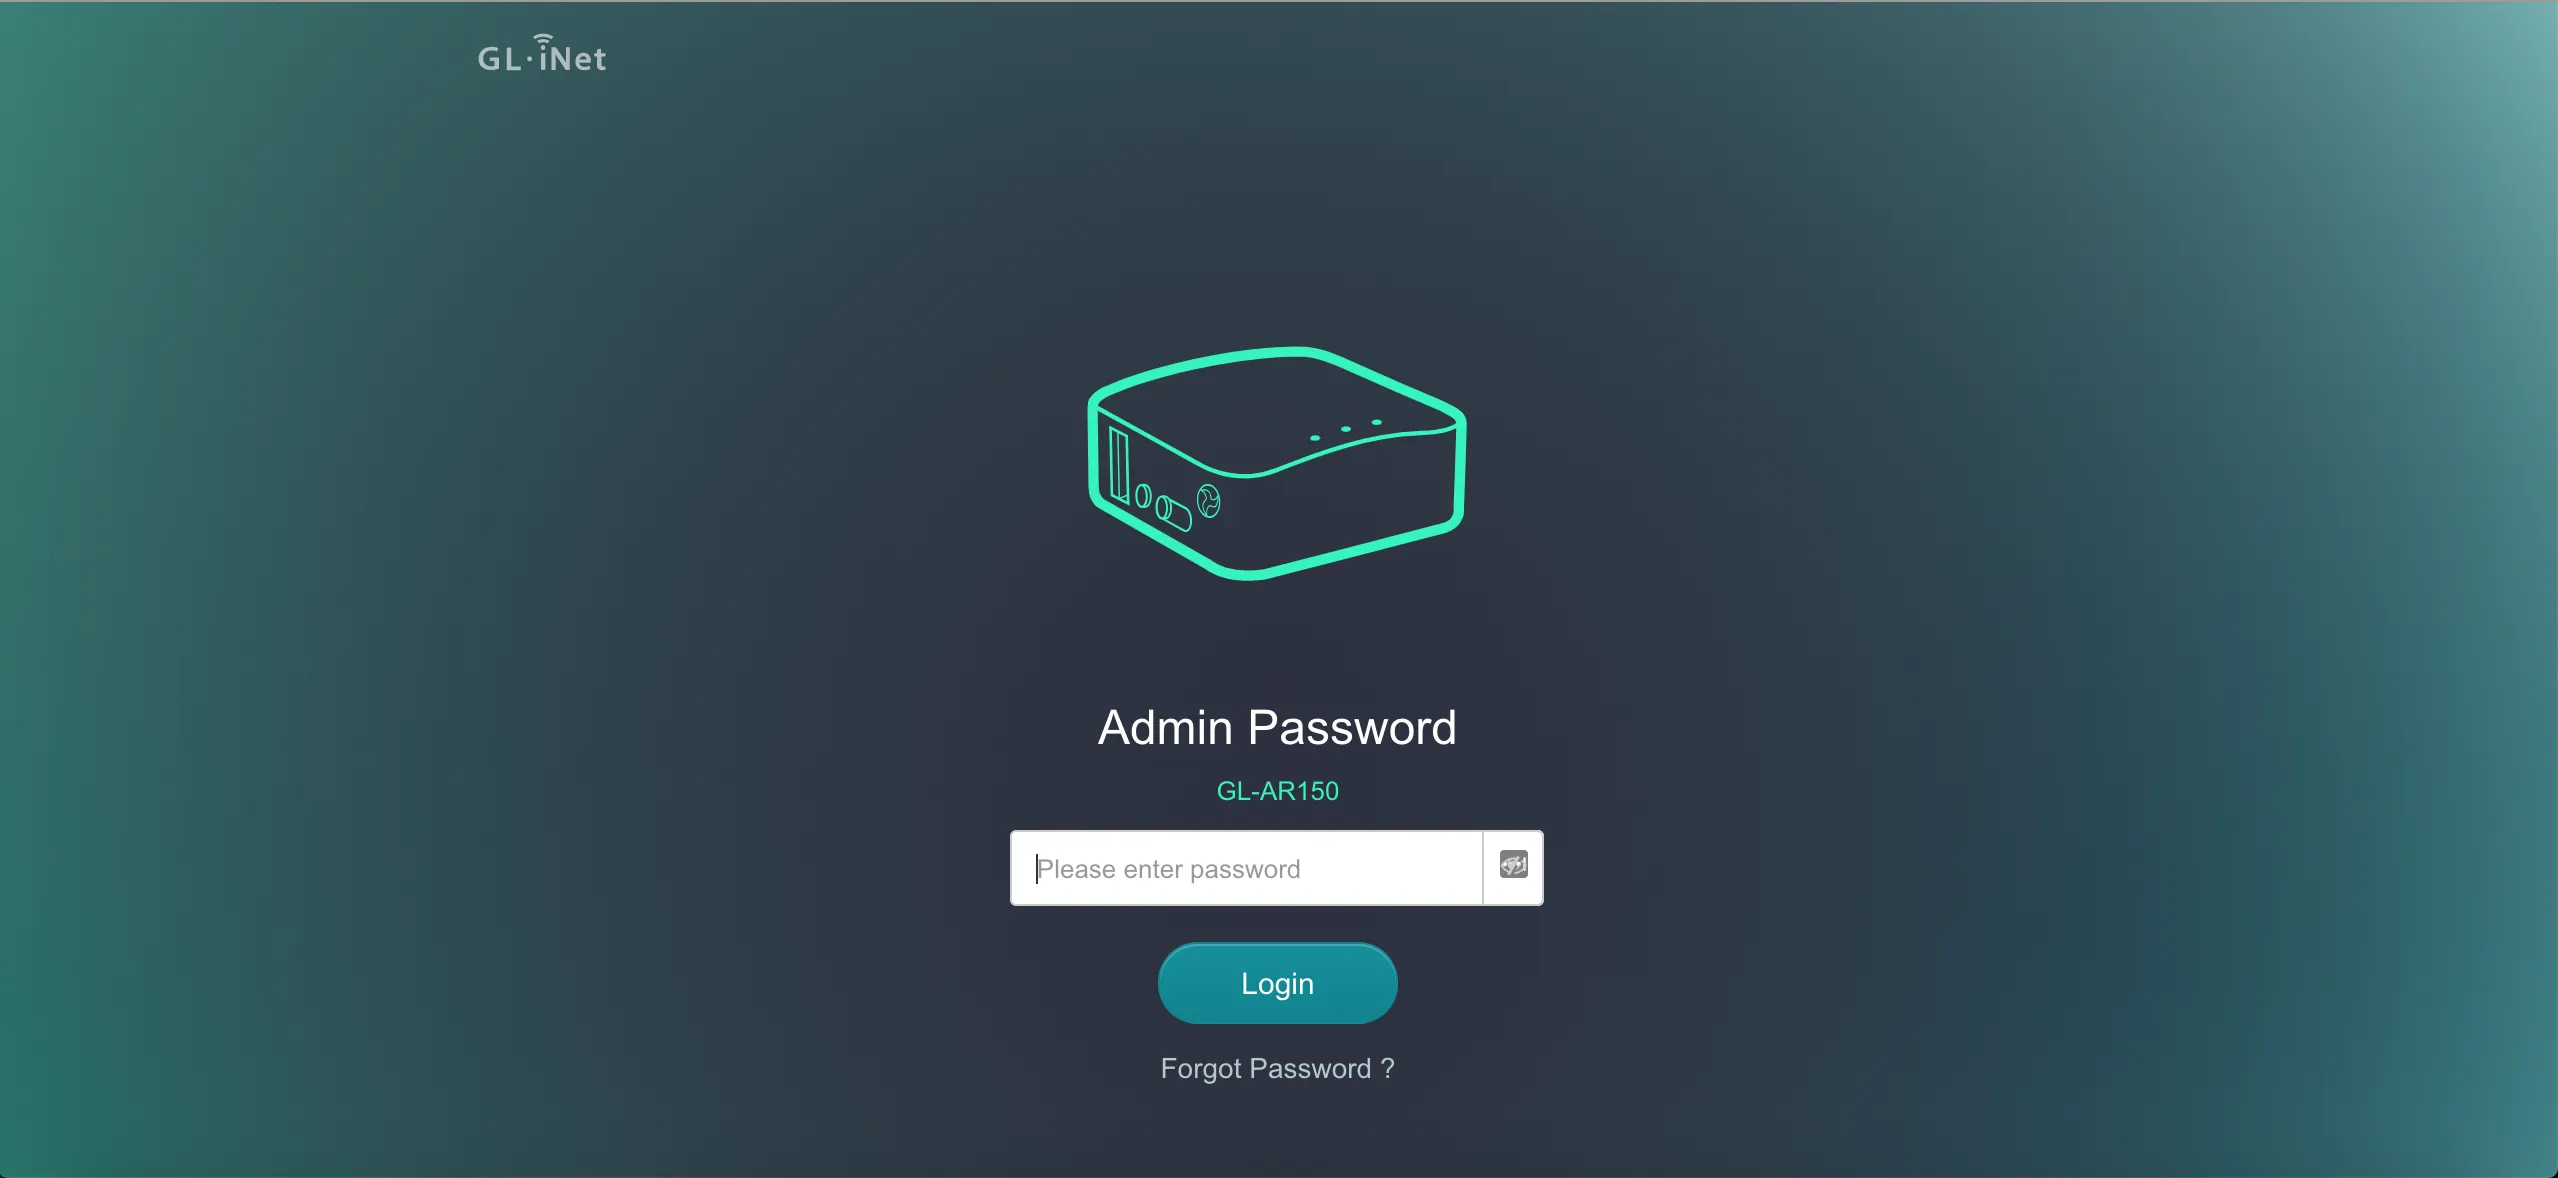
Step 3:
Navigate to http://192.168.1.1 in a web browser and perform initial setup:- Set Password (Note: this password will only be used once)
Step 4:
Step 5:
Step 6:
Step 7:
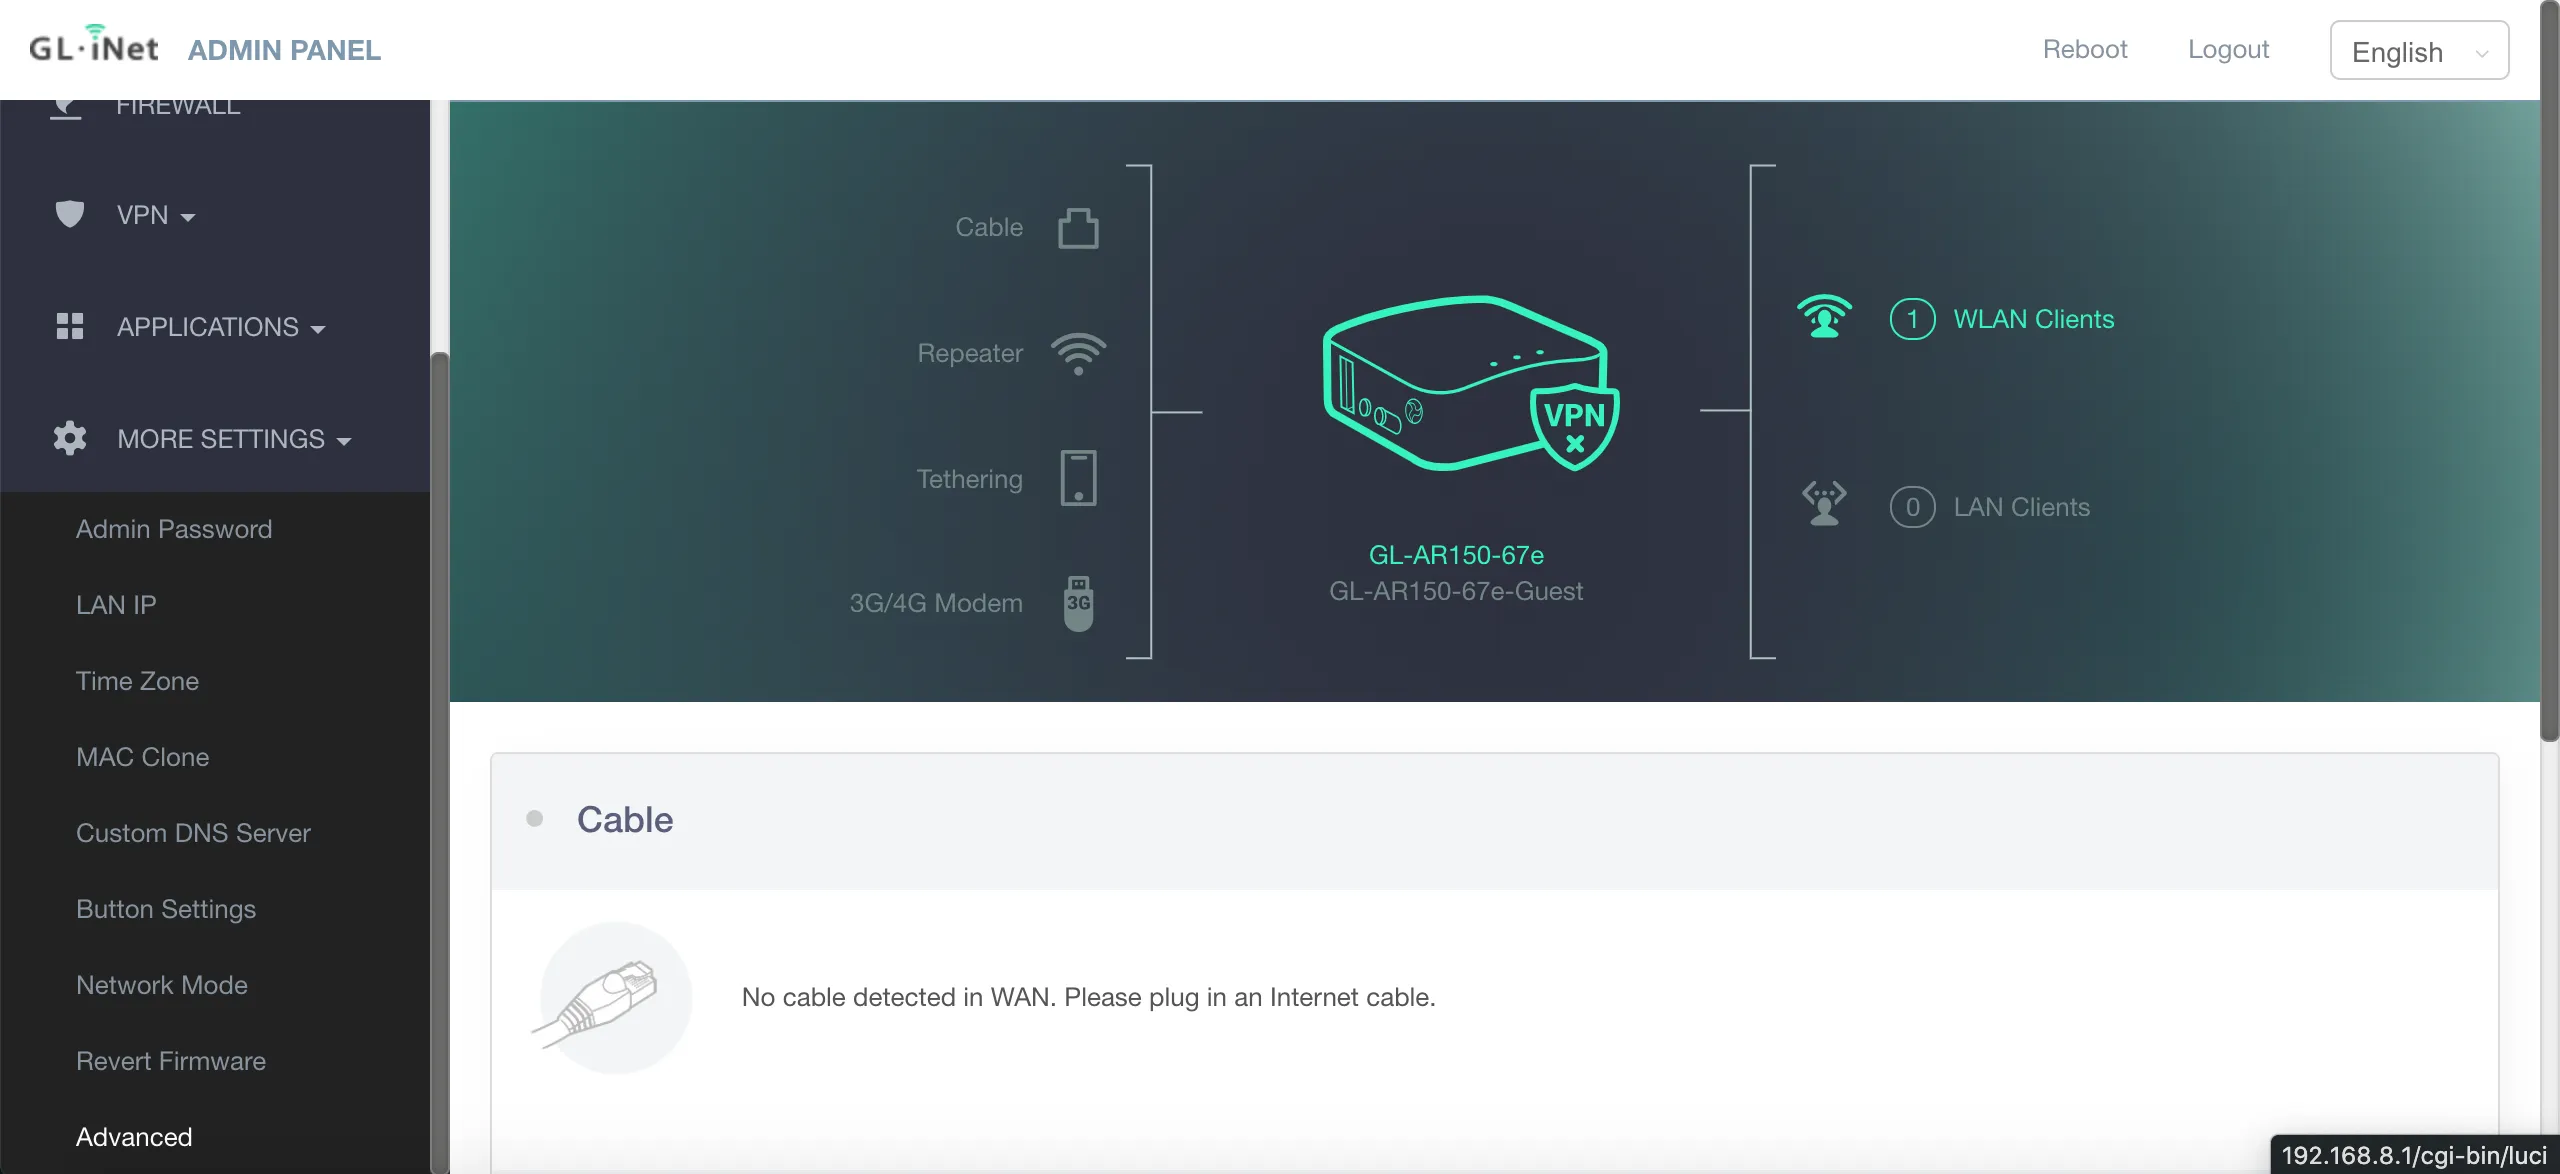
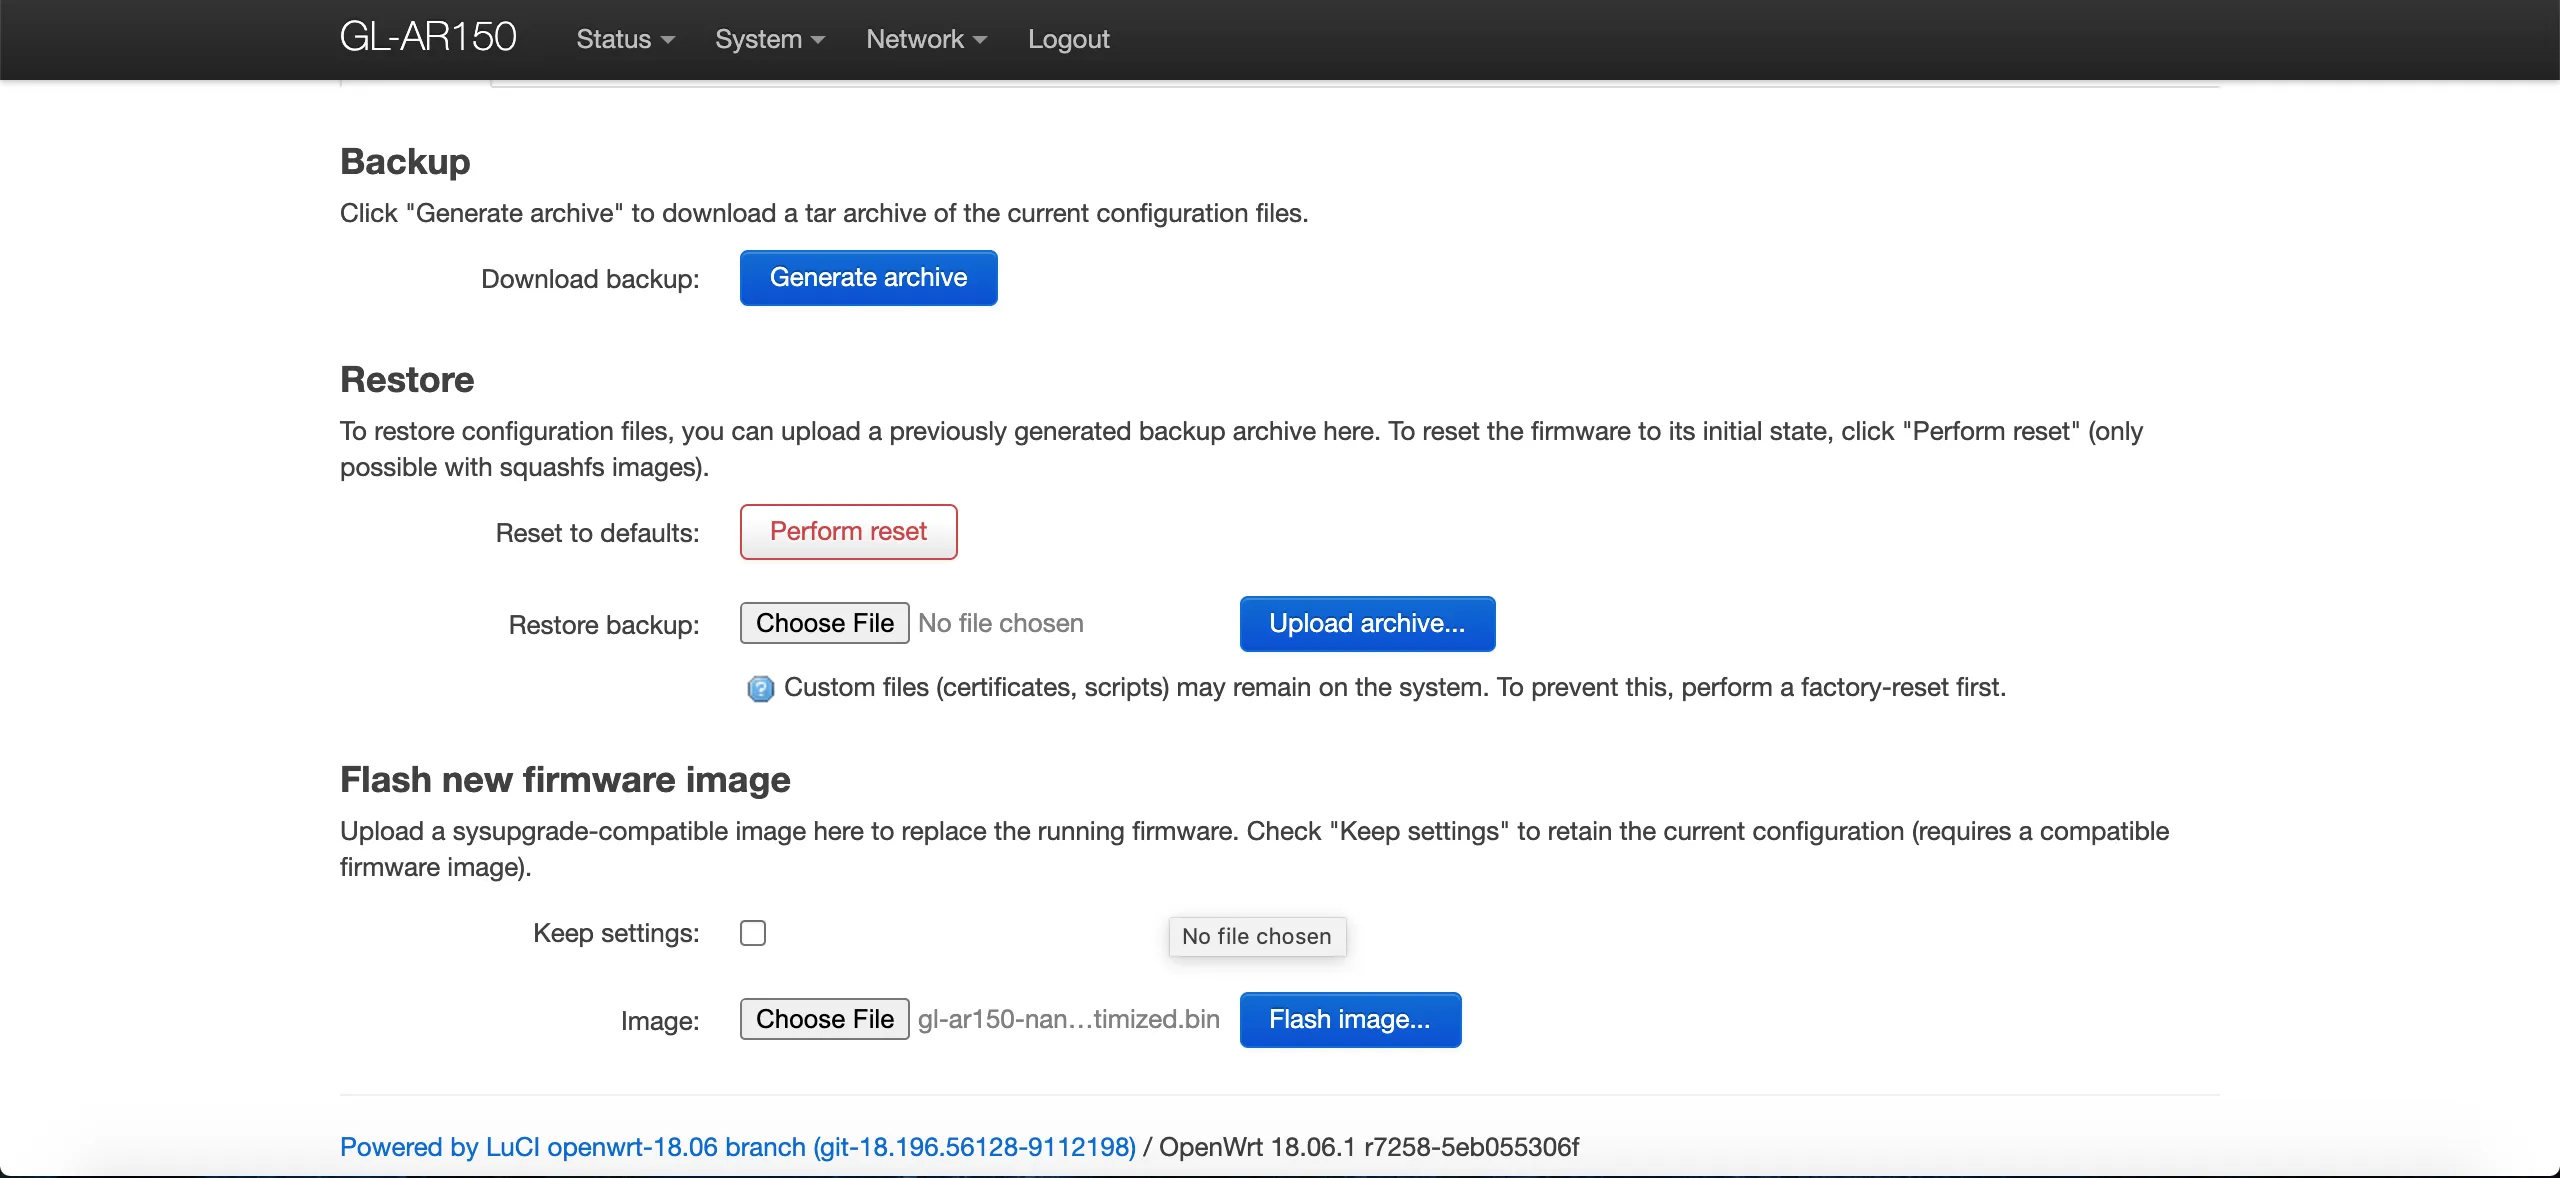
- Under "Flash new firmware image" uncheck "Keep settings"
- Choose File and select the .bin you downloaded in step 1
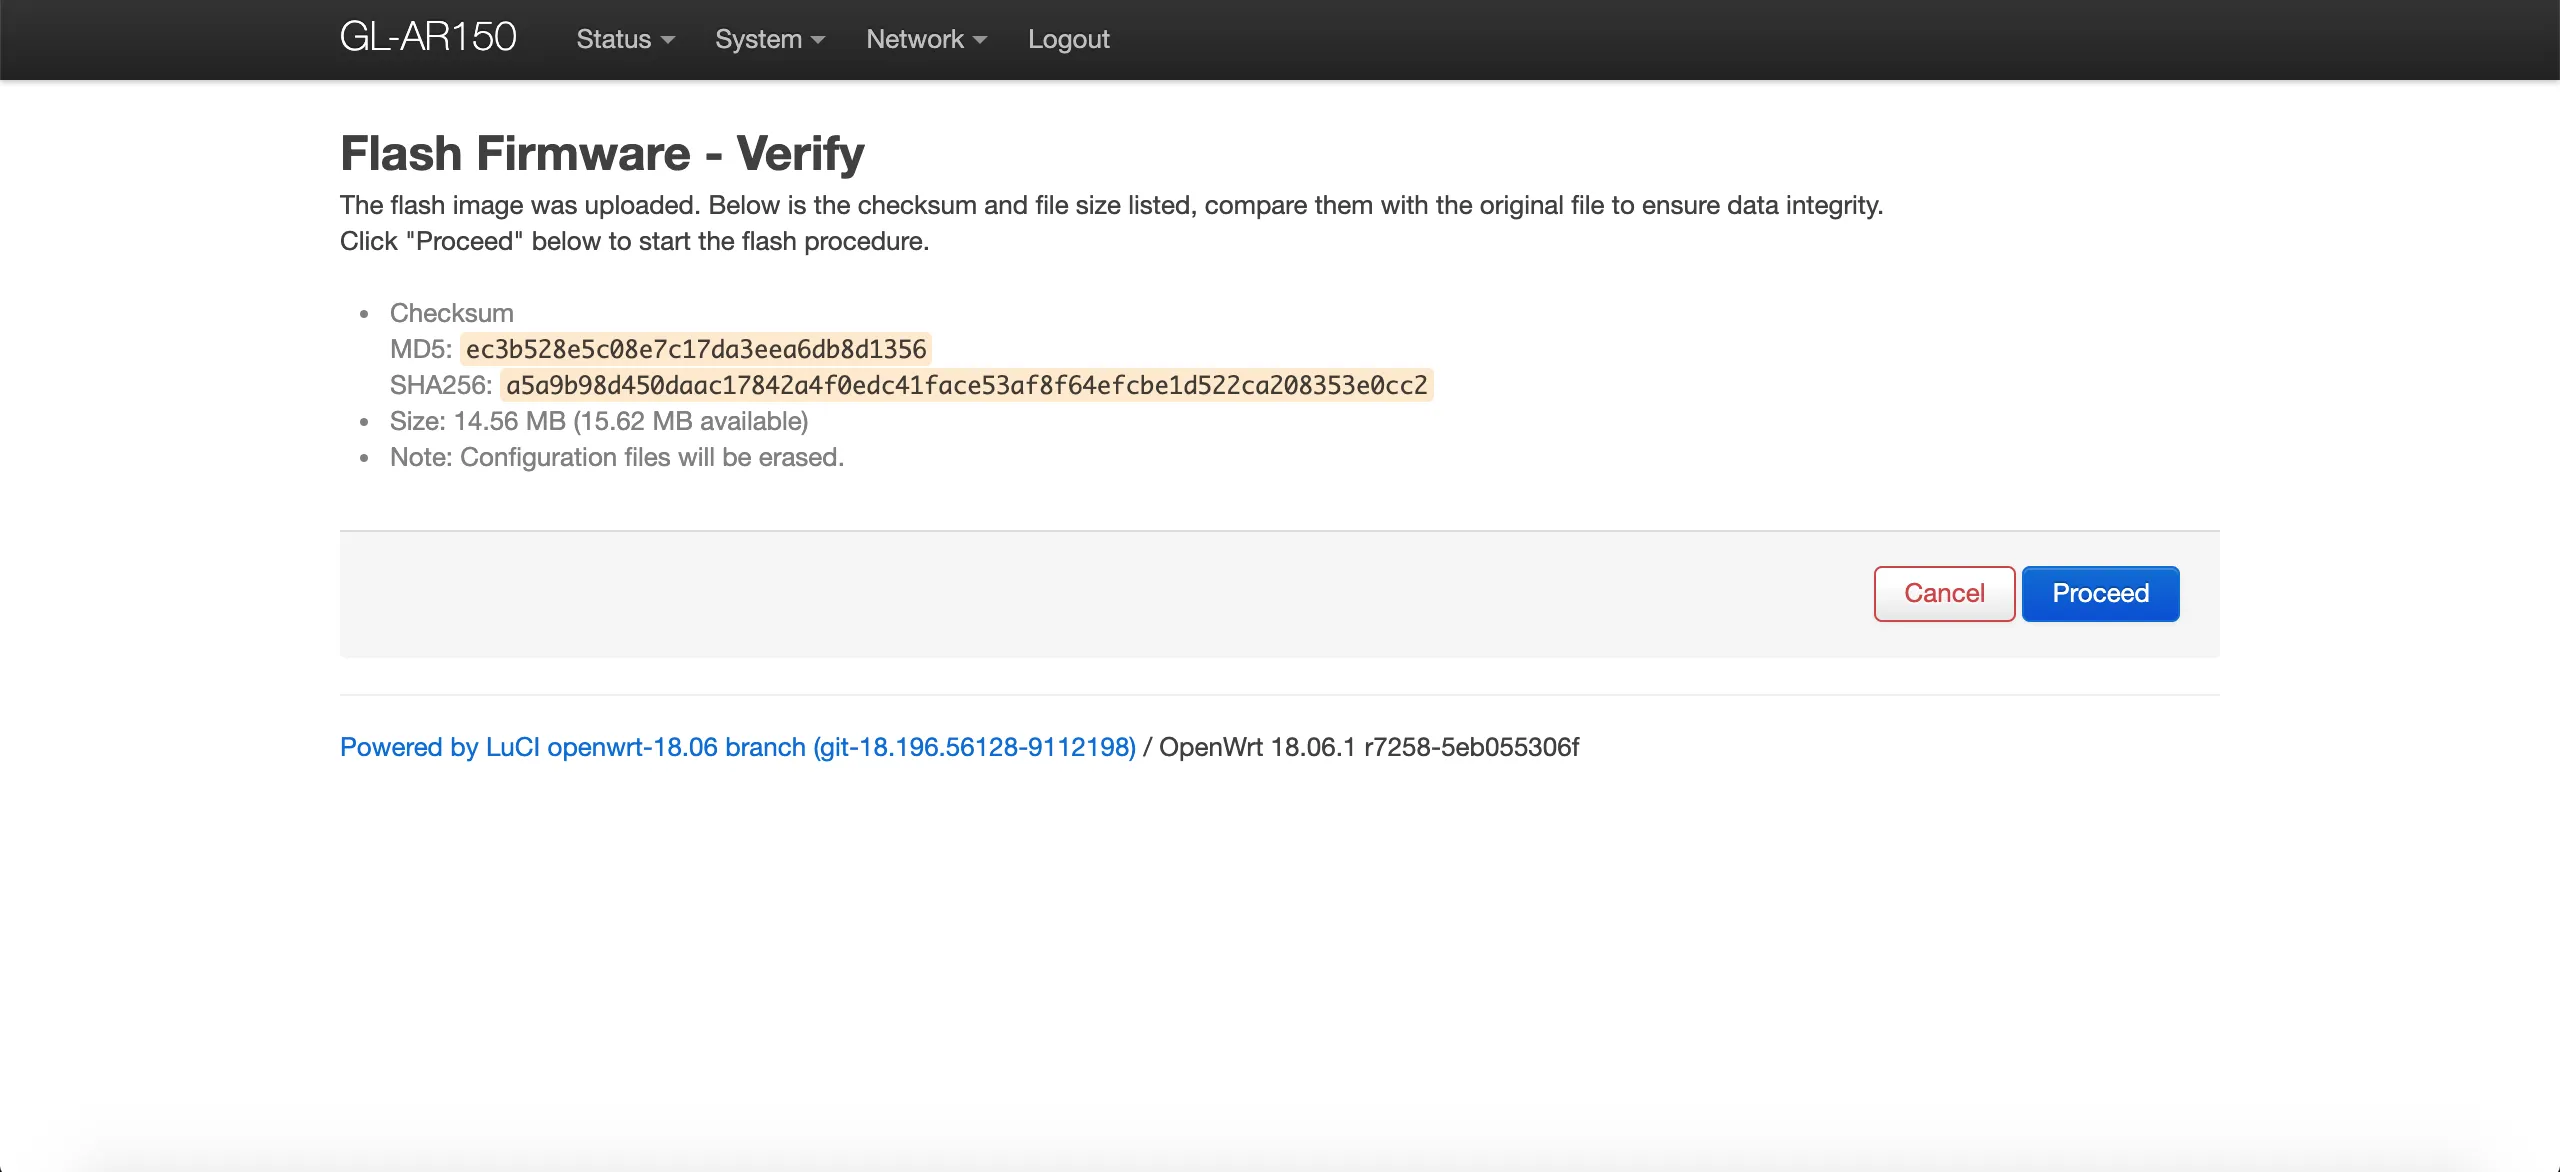
- Click "Flash image"
Step 8:
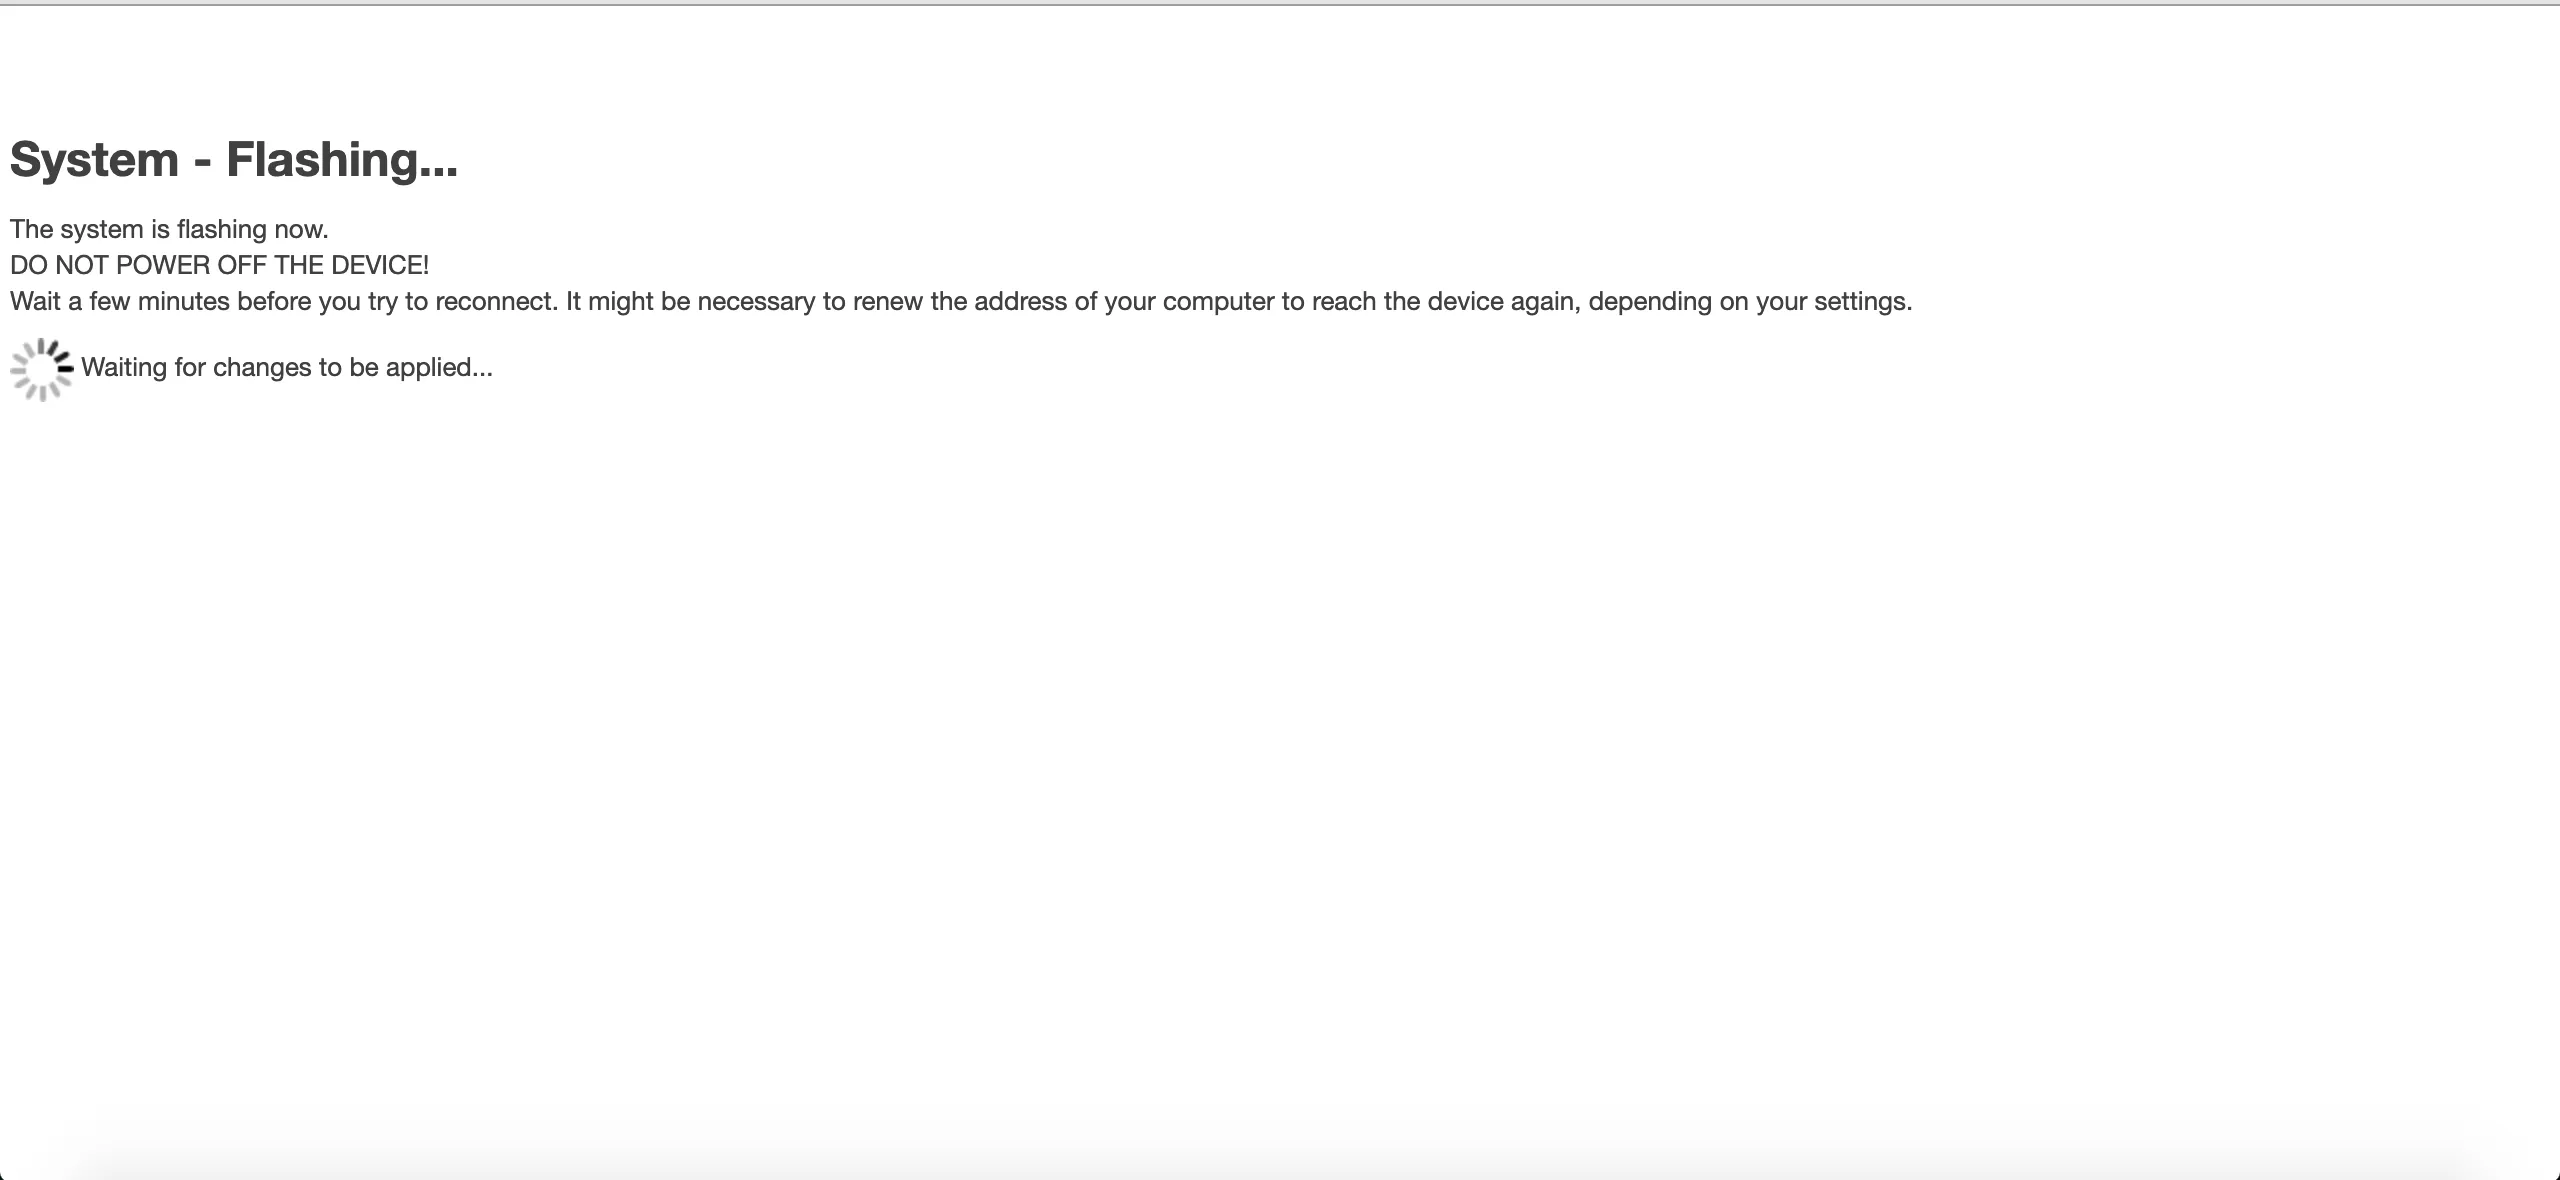
Step 9:
- The device will now have a different Wifi SSID and IP address range.
- Follow the guide bellow to connect to the pineapple over Wifi or LAN...
Step 10:
If on WiFi
- Search for a network with "pineapple" in the name, connect to it
- Change your computer's IP address to "172.16.42.42"
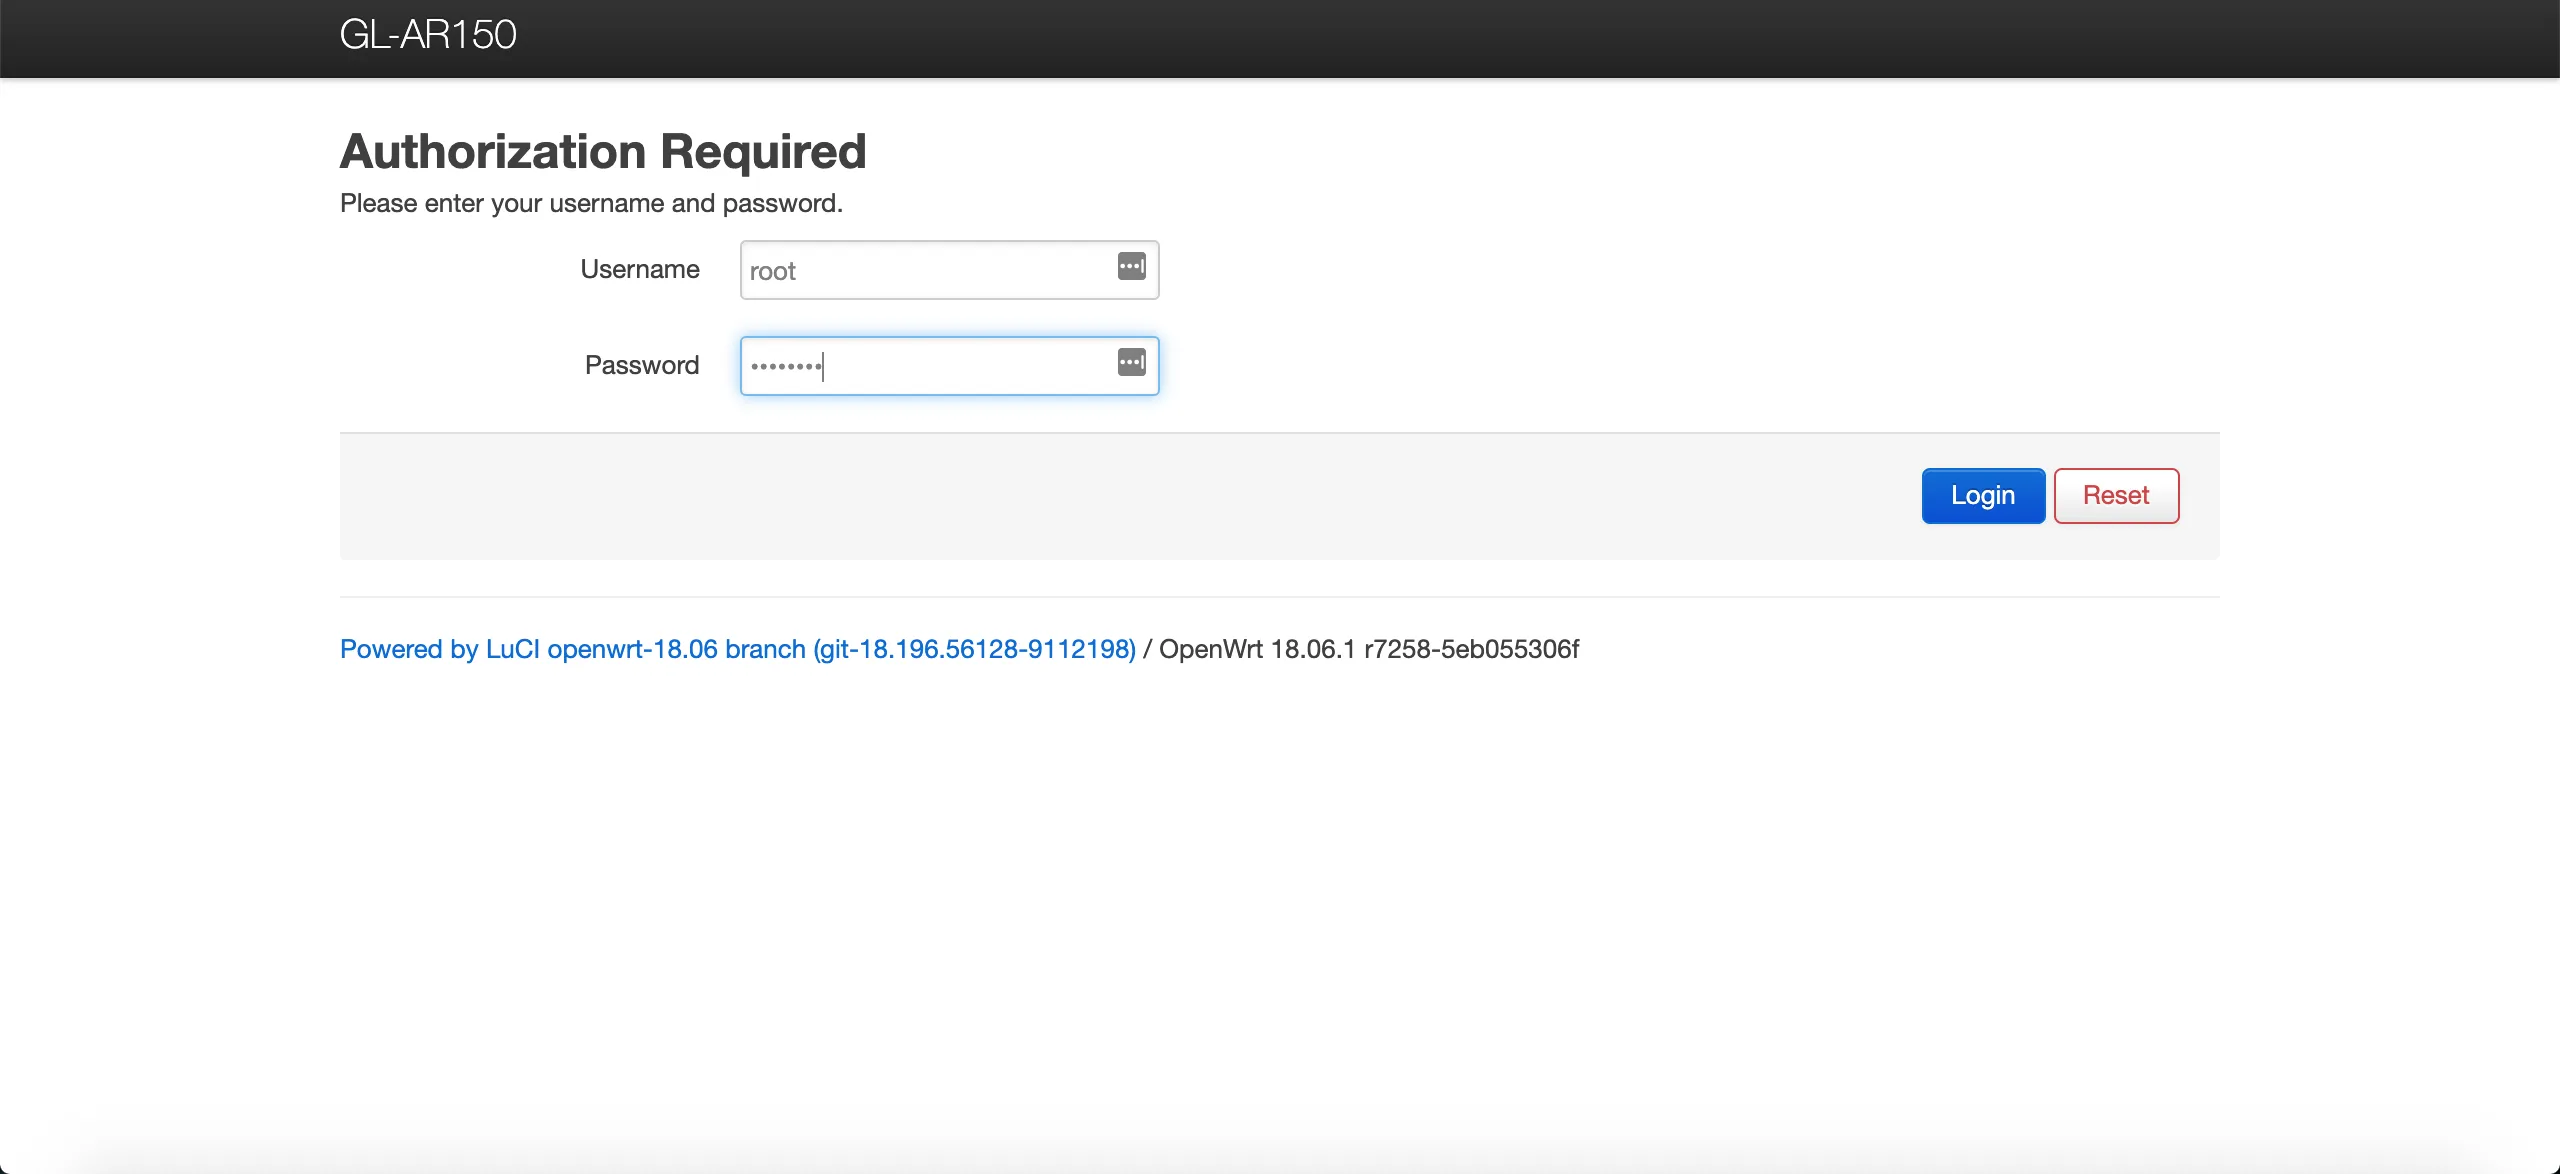
- Navigate to https://172.16.42.1:1471 in your web browser
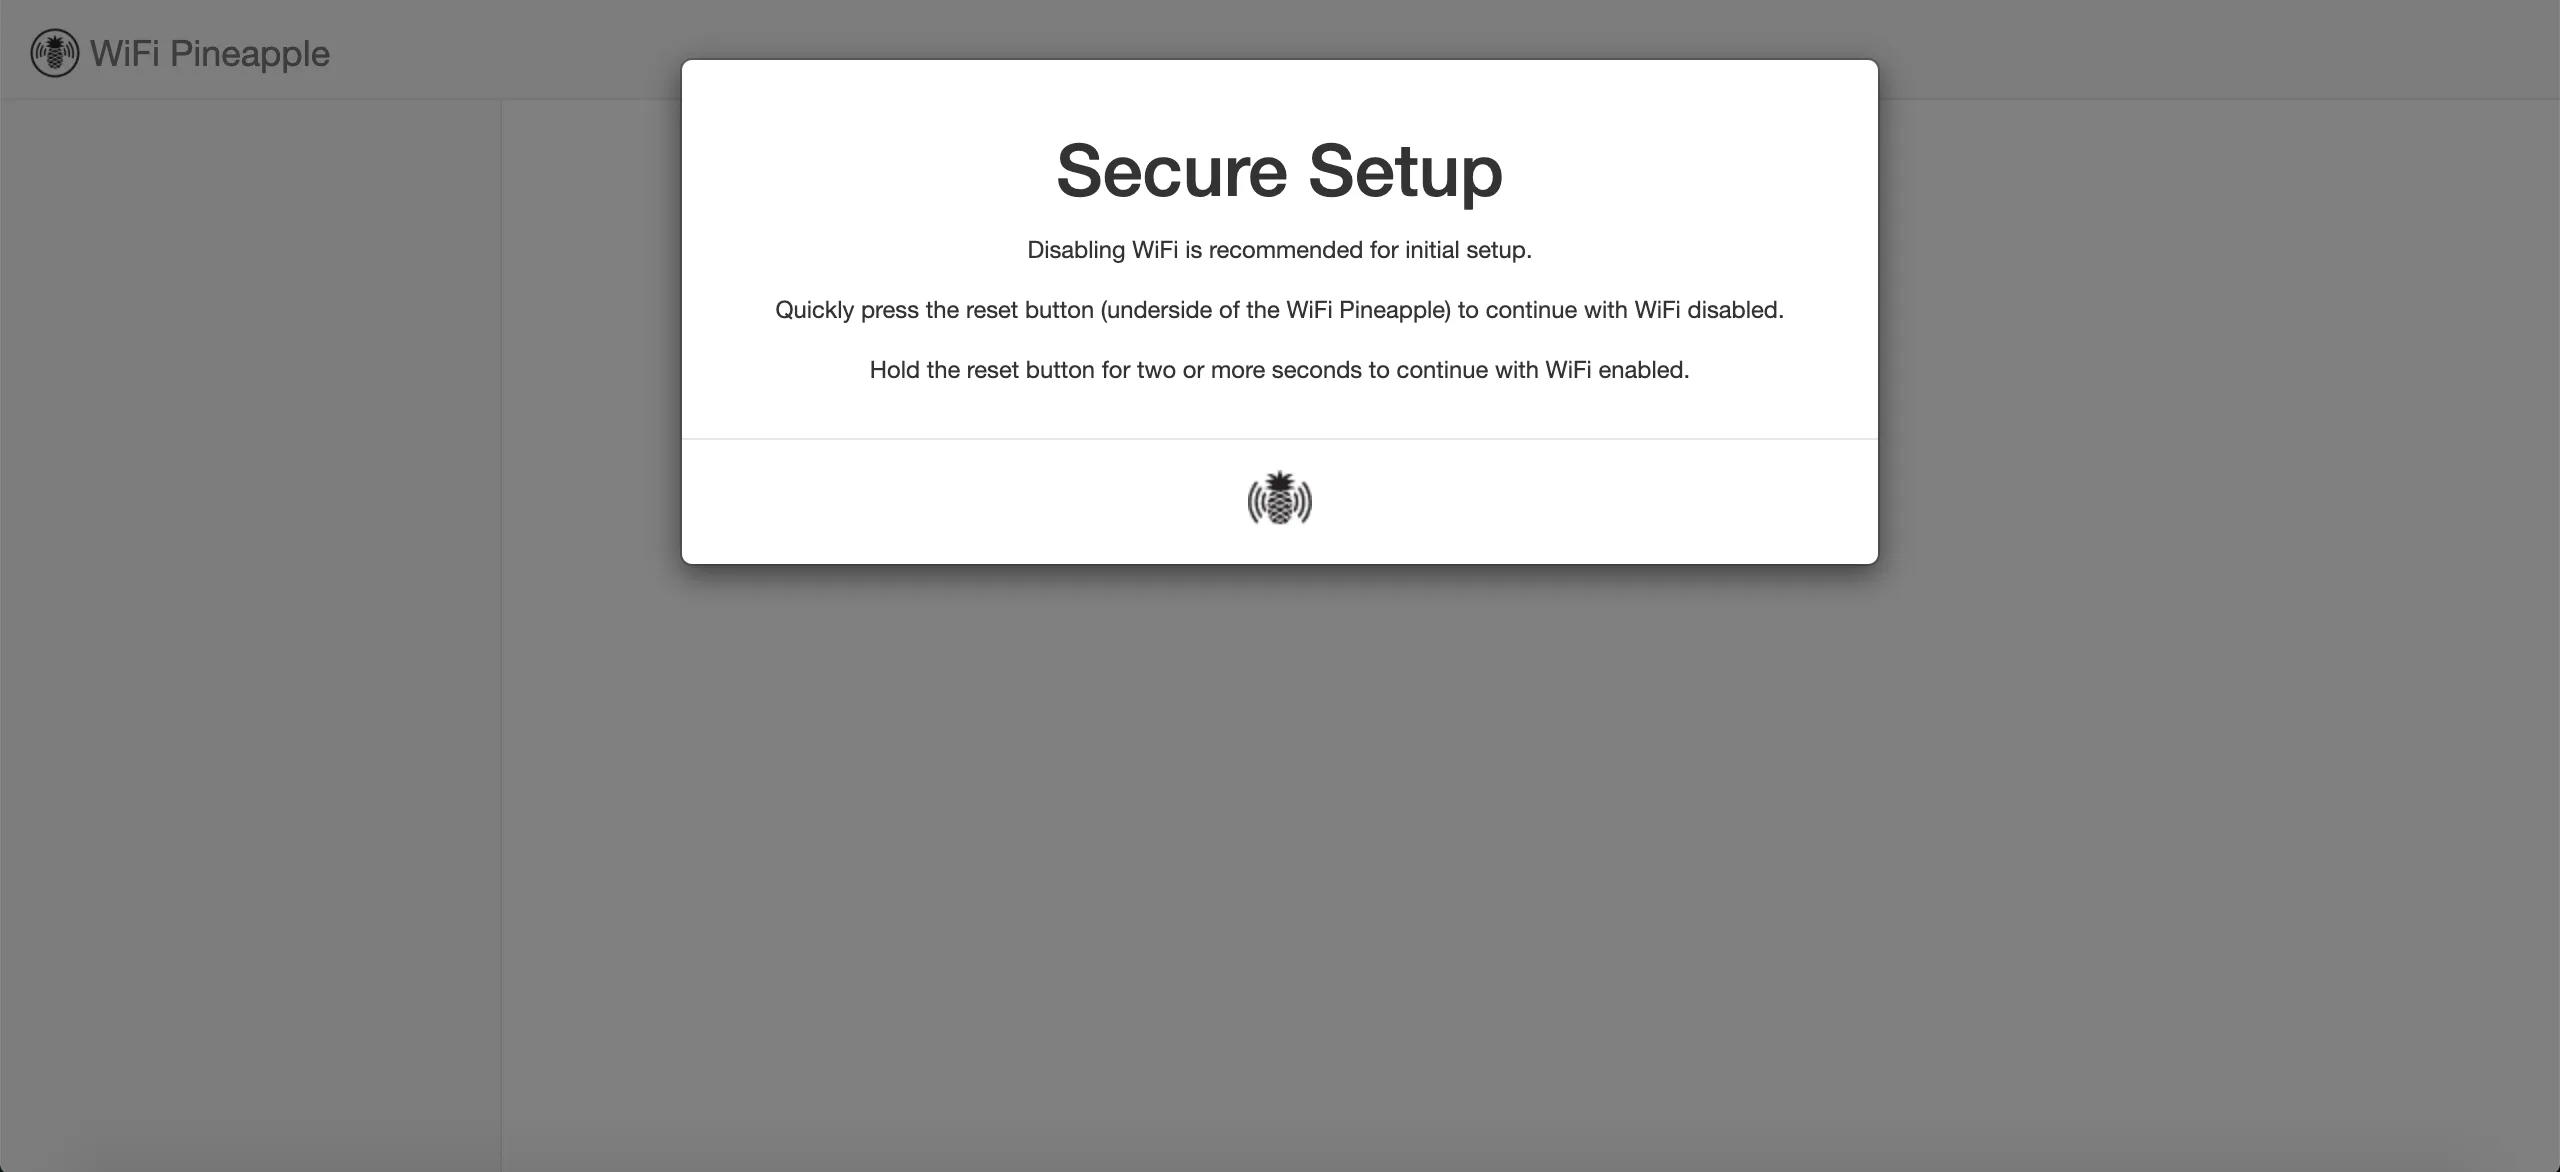
- When you see the prompt for "Secure Setup", proceed by holding the reset button for ~5 seconds
If on Ethernet LAN
- Change your computer's IP address to "172.16.42.42"
- Navigate to https://172.16.42.1:1471 in your web browser
- When you see the prompt for "Secure Setup", proceed by quickly pressing the reset button (don't hold it)

Step 11:
- Root Password
- Time Zone
- other
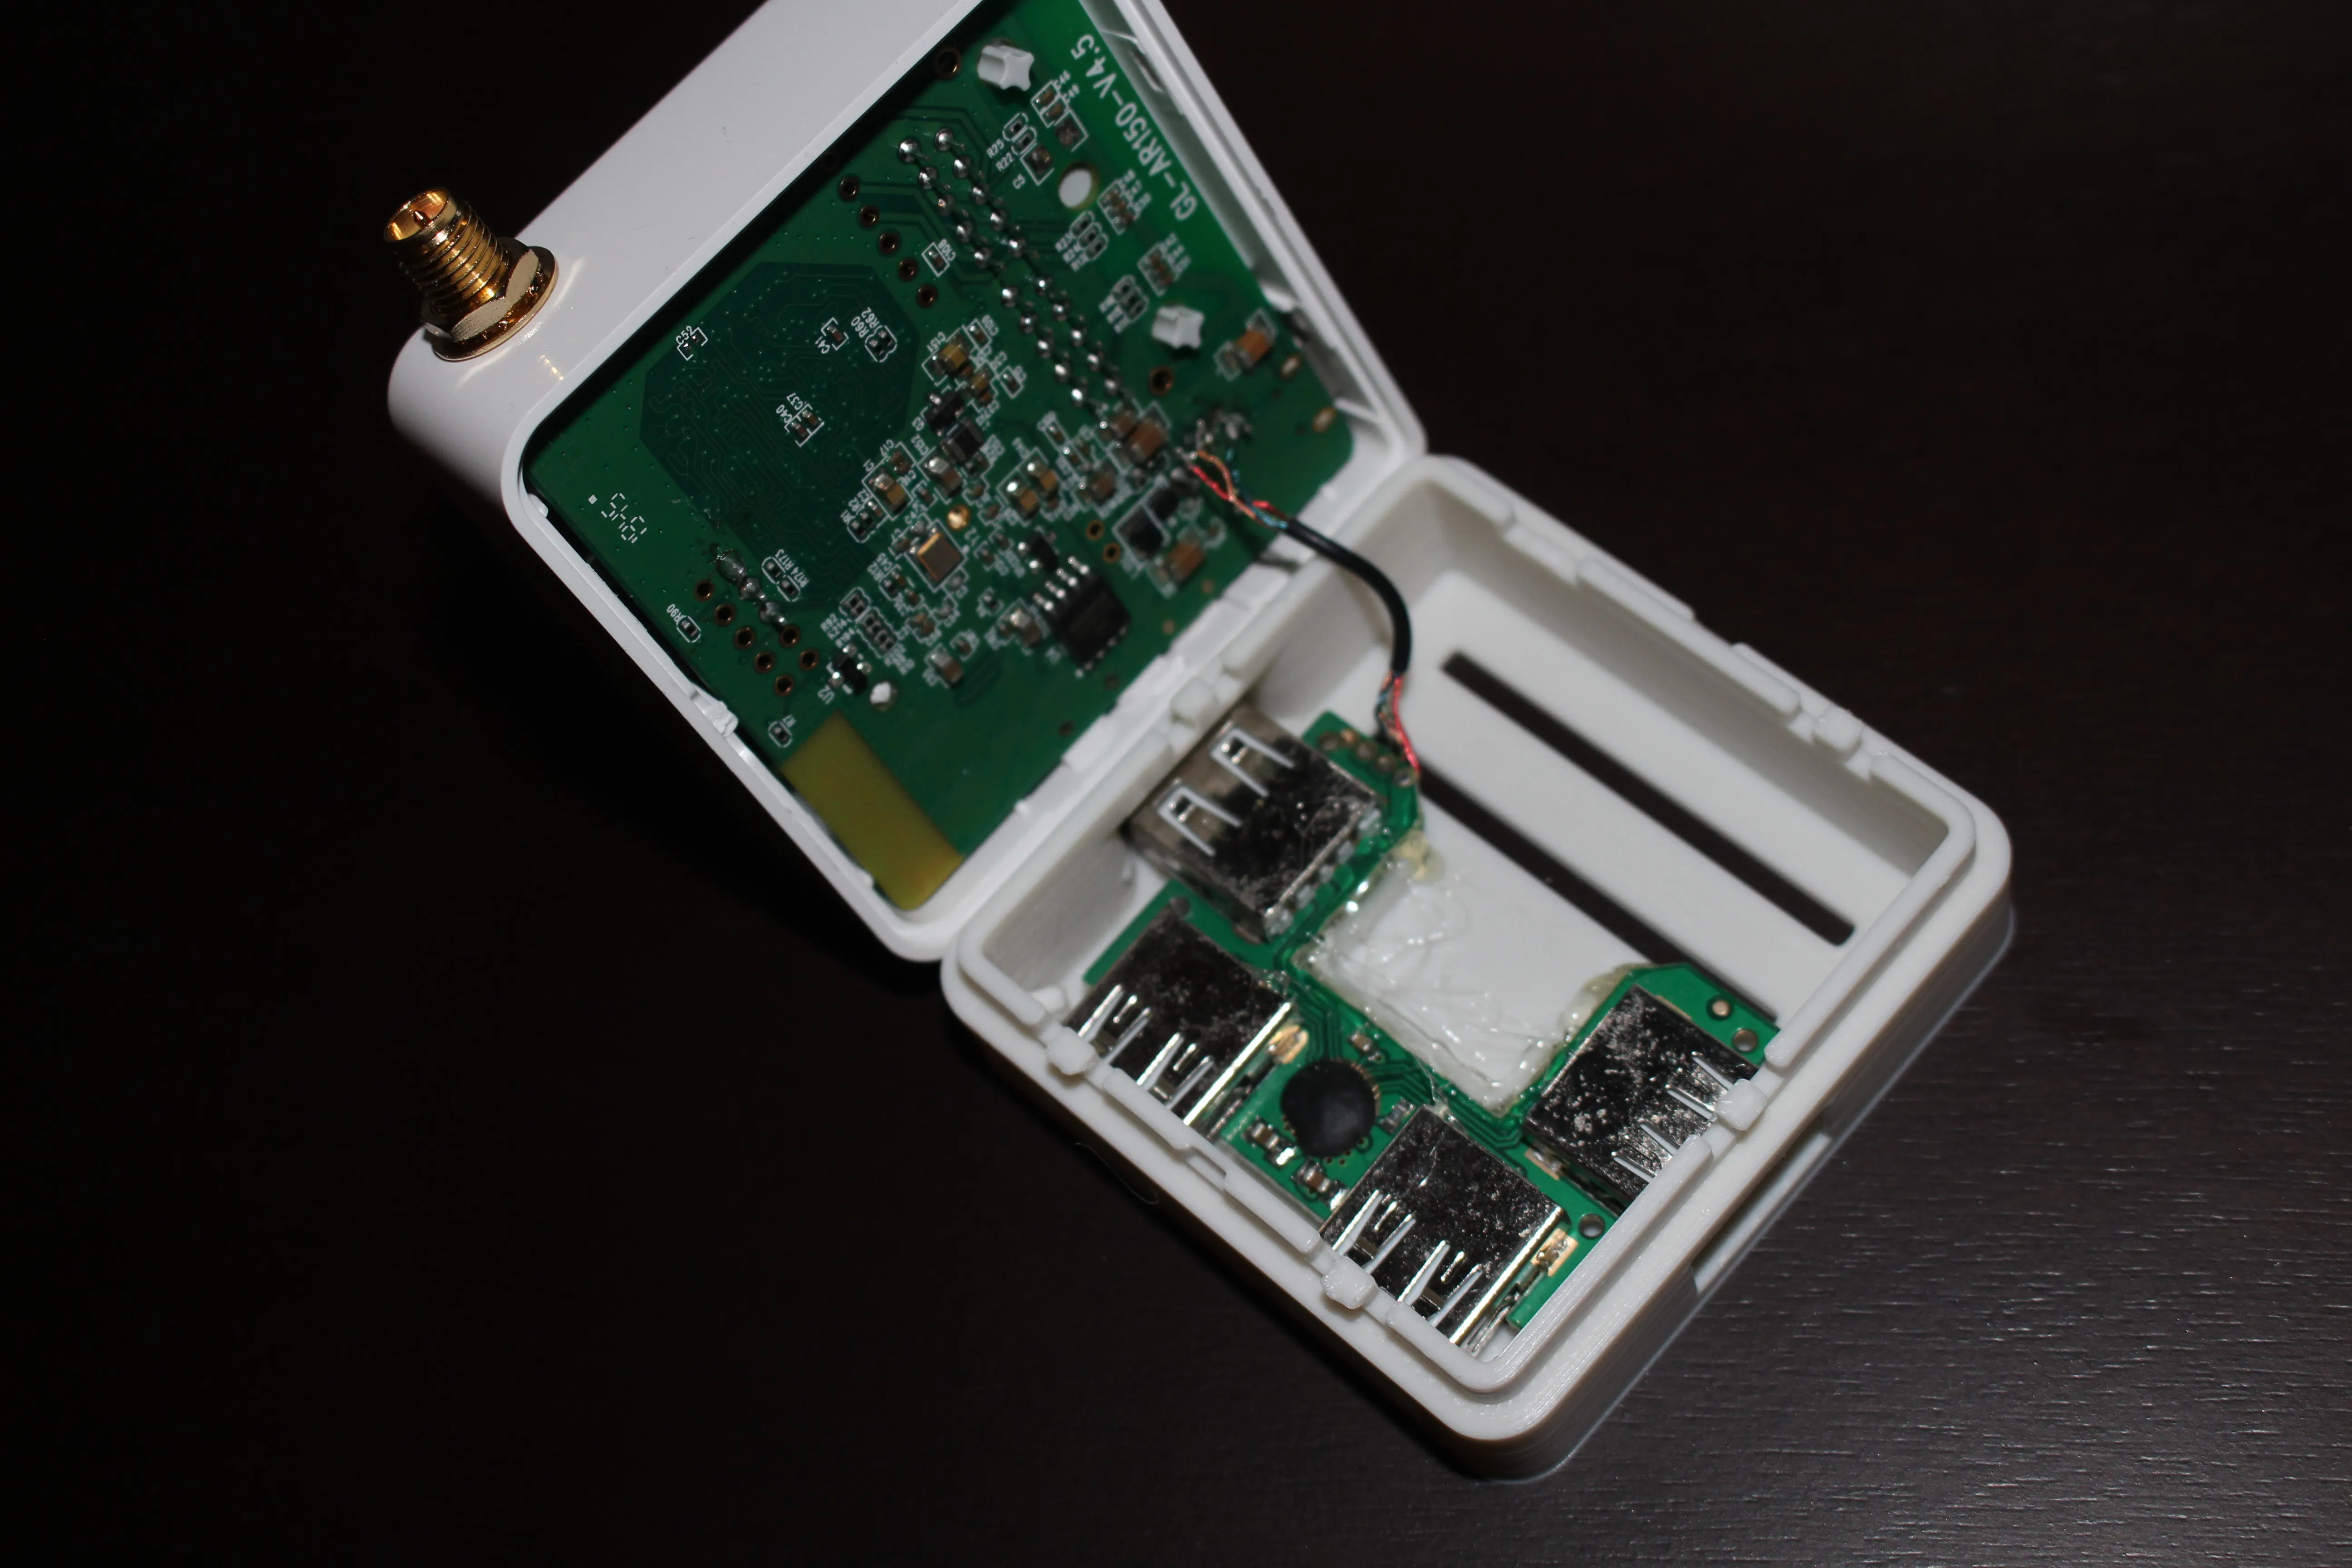
Hardware Modifications
Step 1:
Step 2:
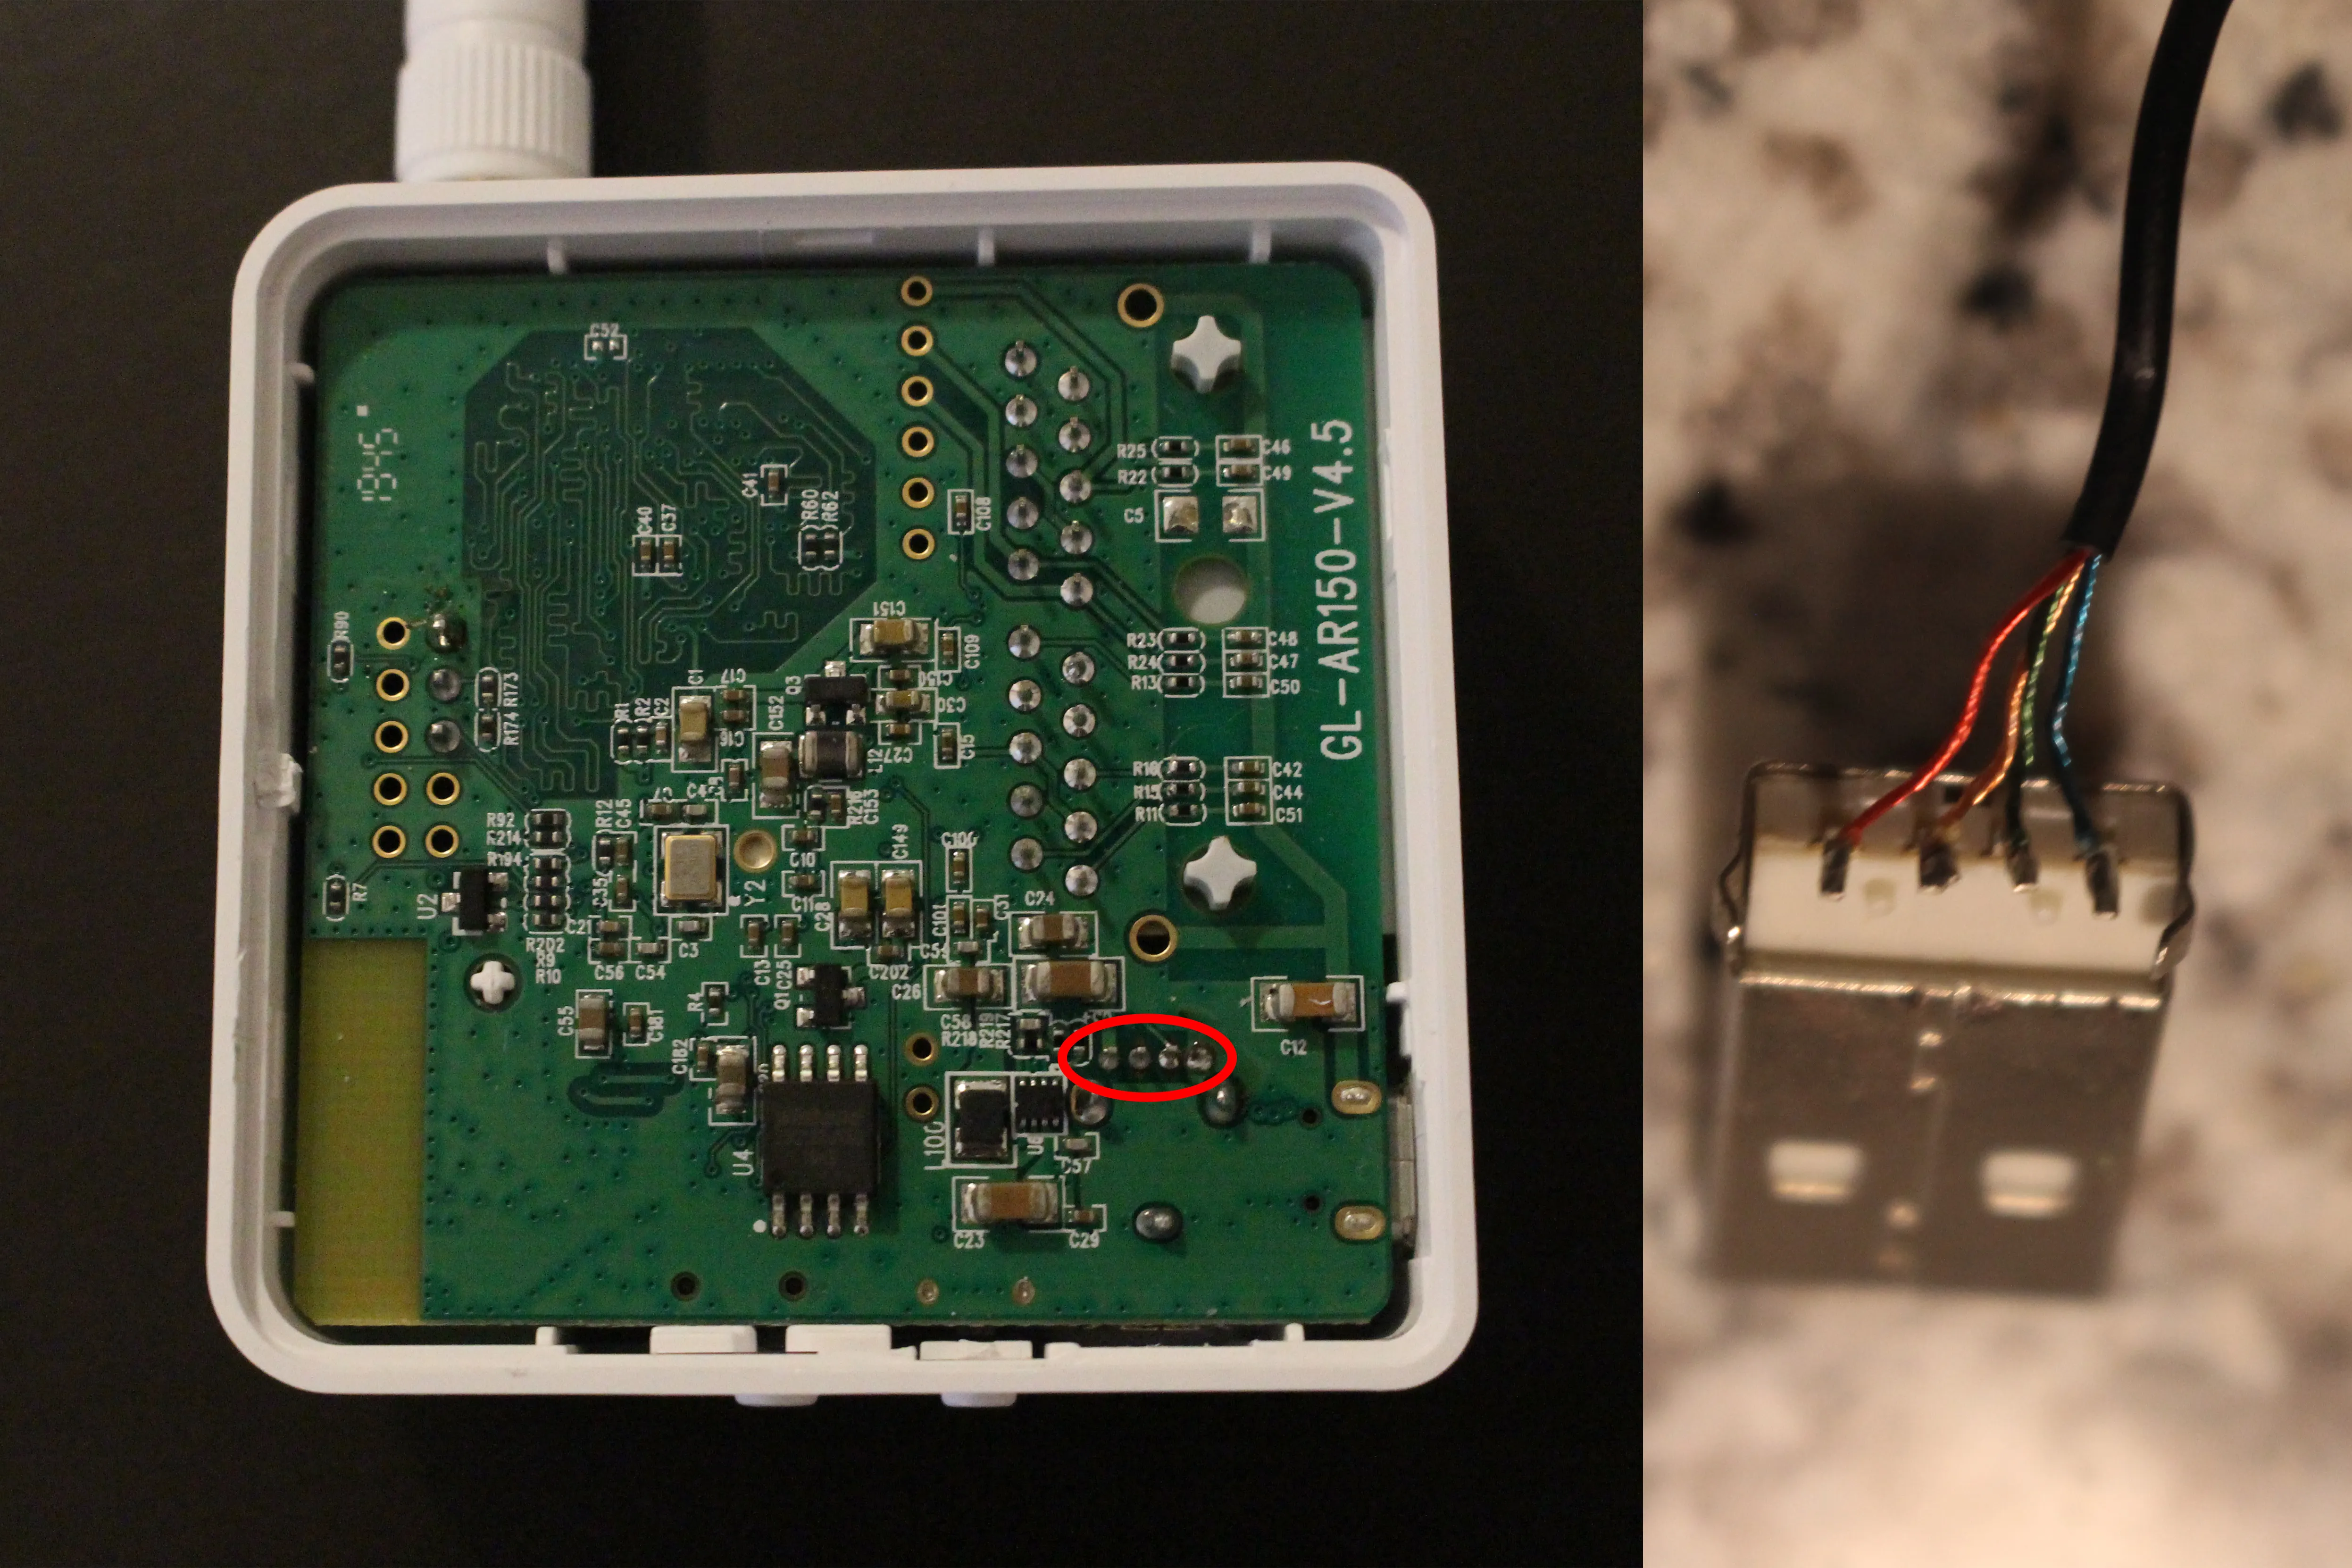
Step 3:
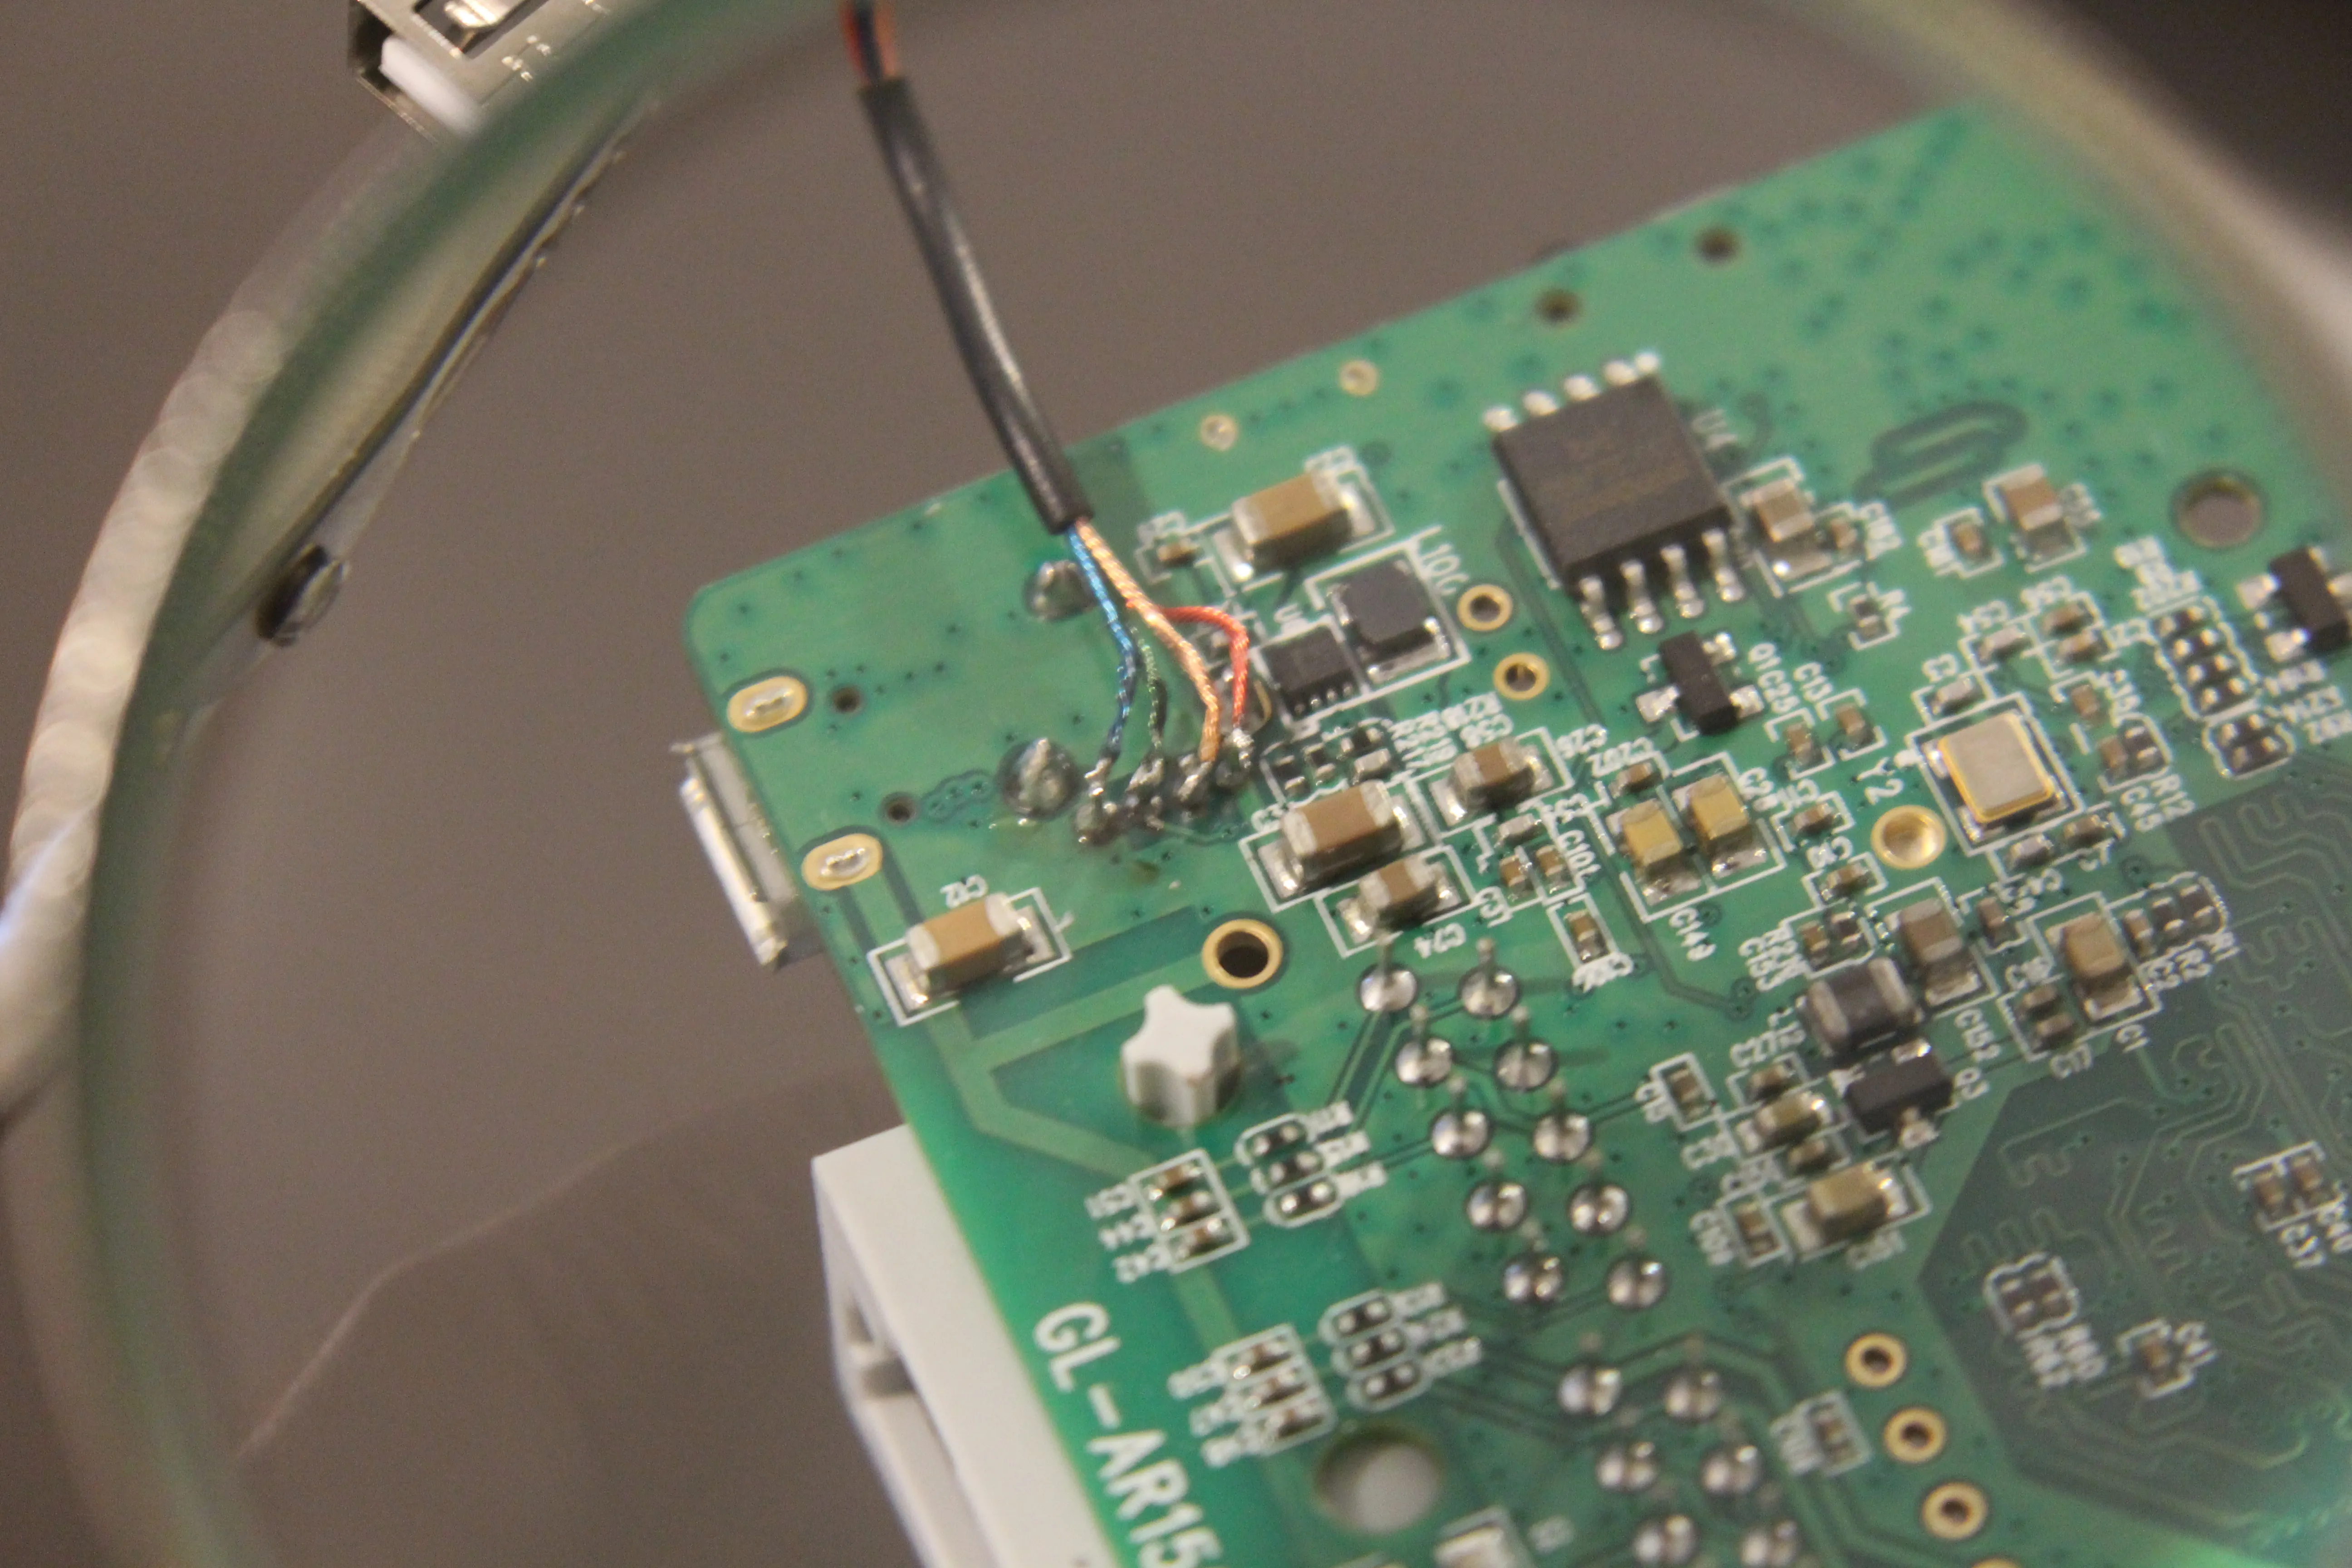
Step 4:
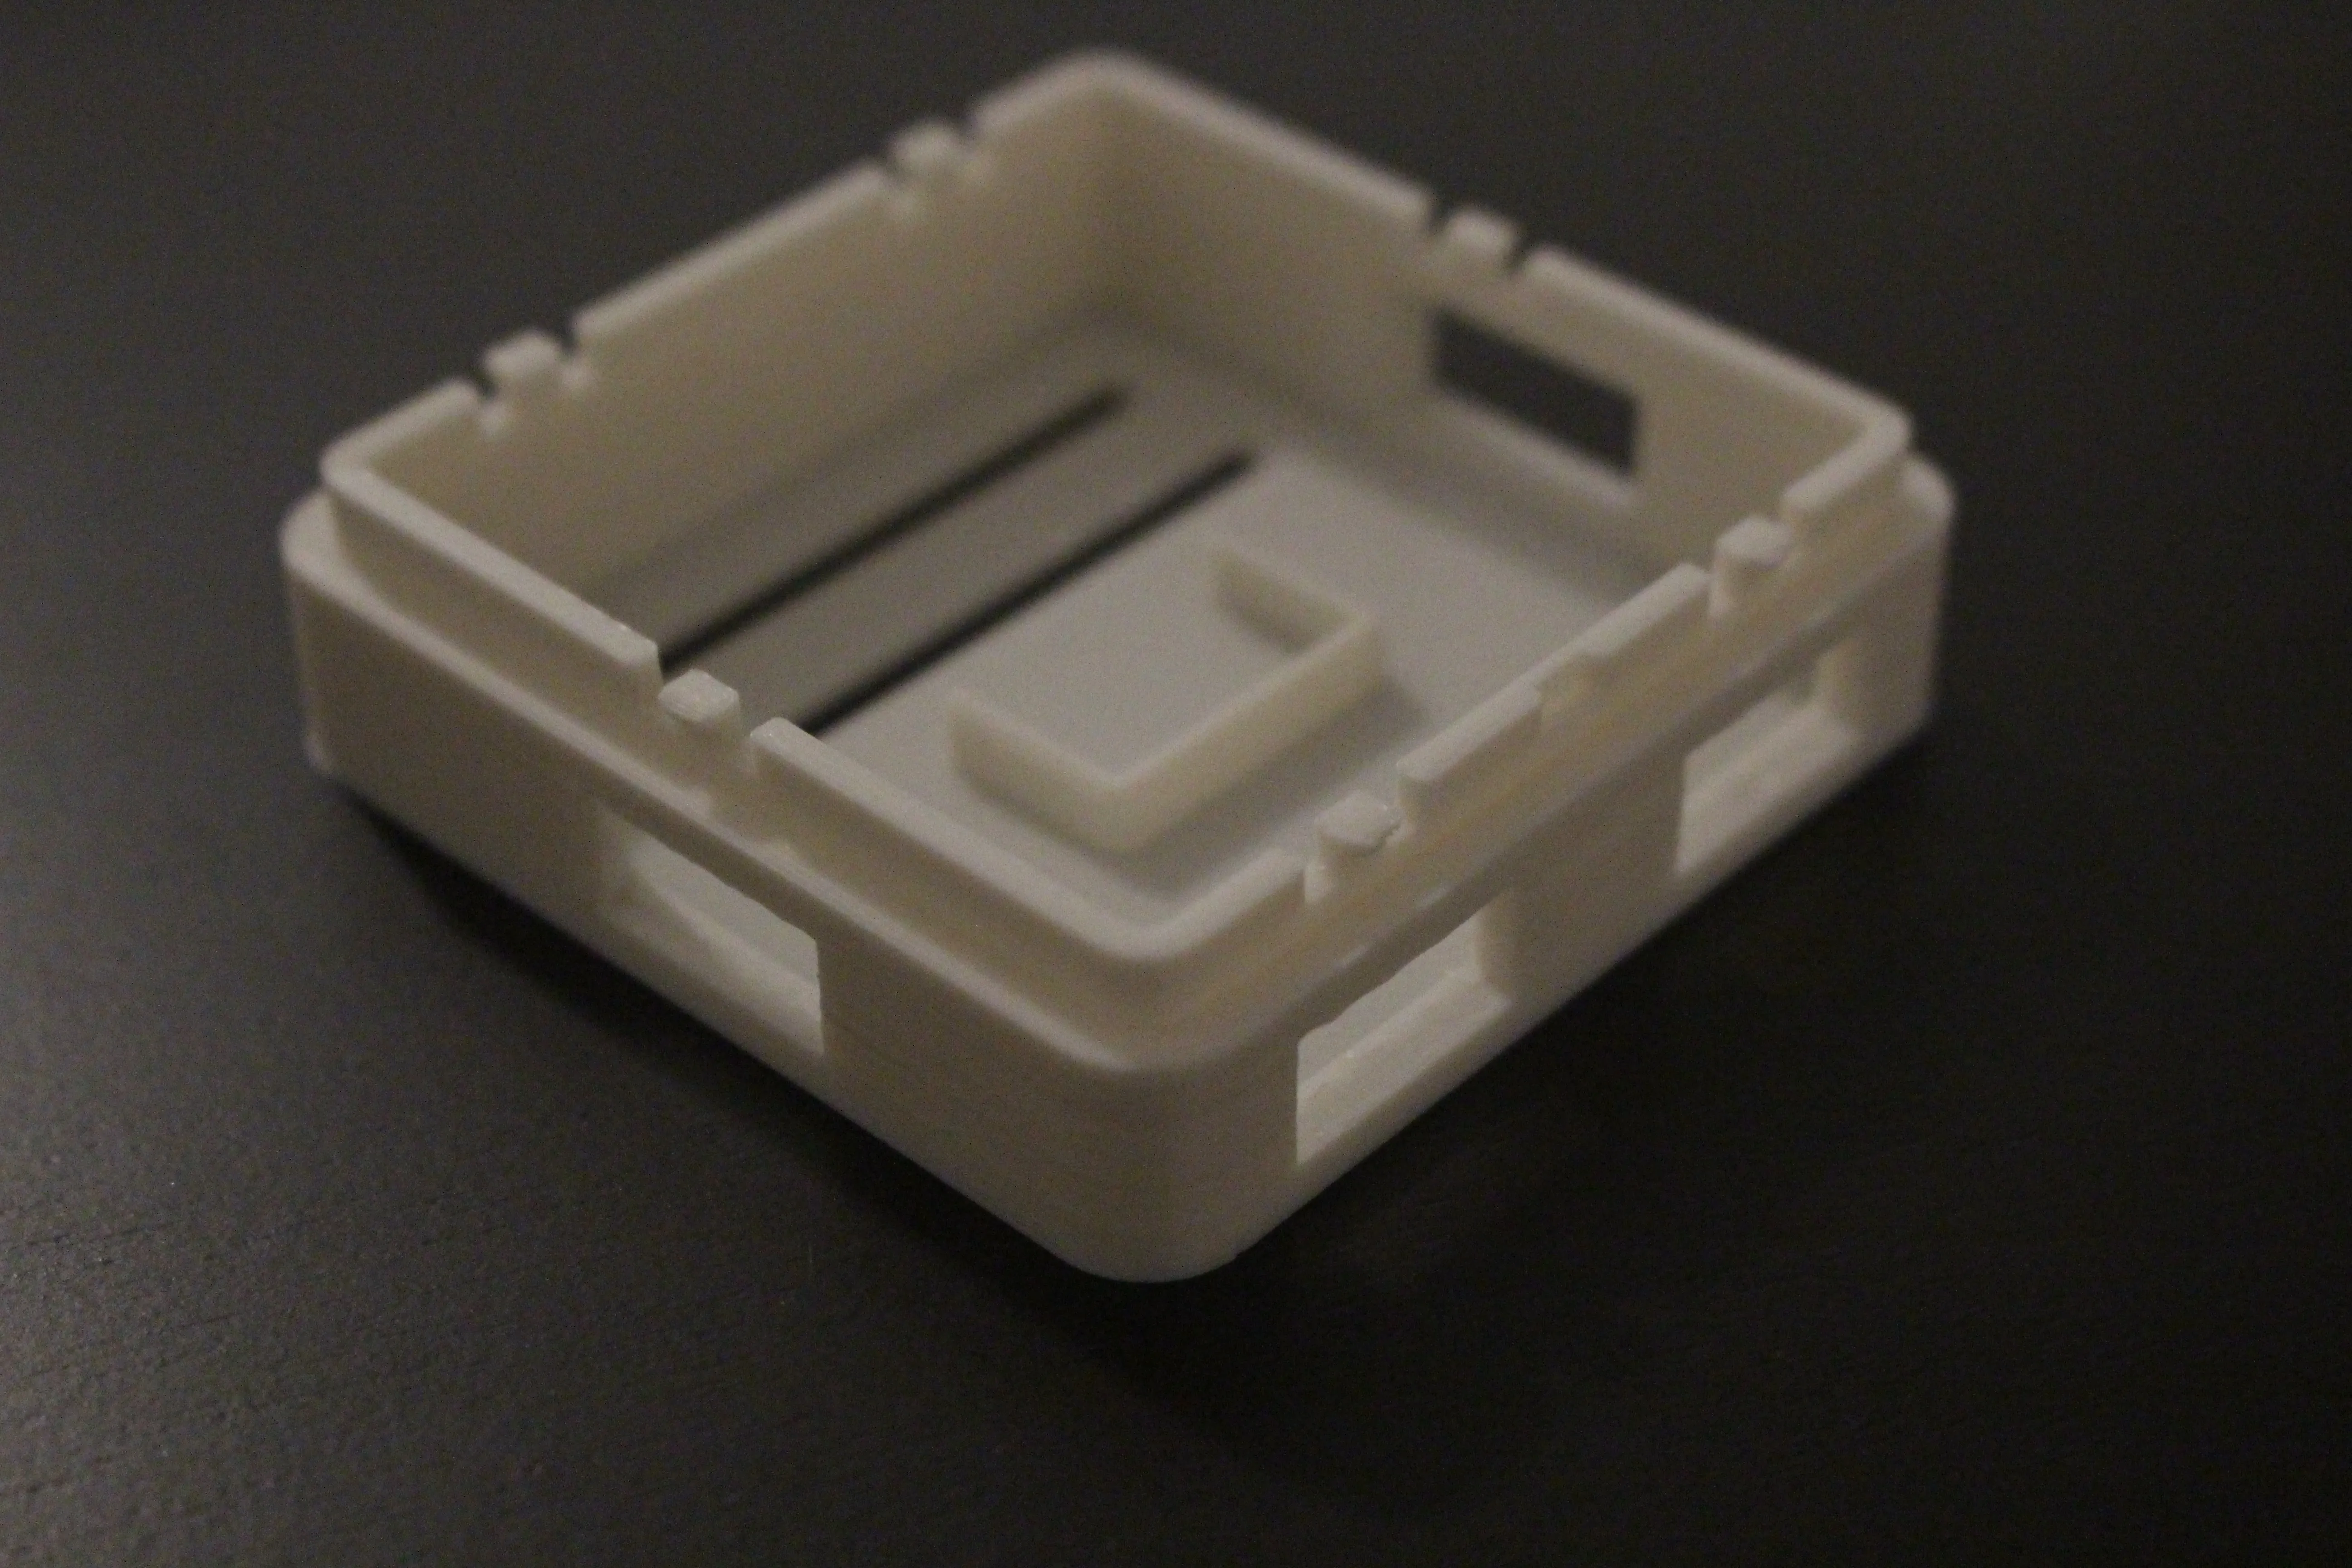
Step 5:
- Plastic: PLA or PETG (ABS may shrink and cause model to not fit)
- Layer Height:
- Density: %
Step 6: